


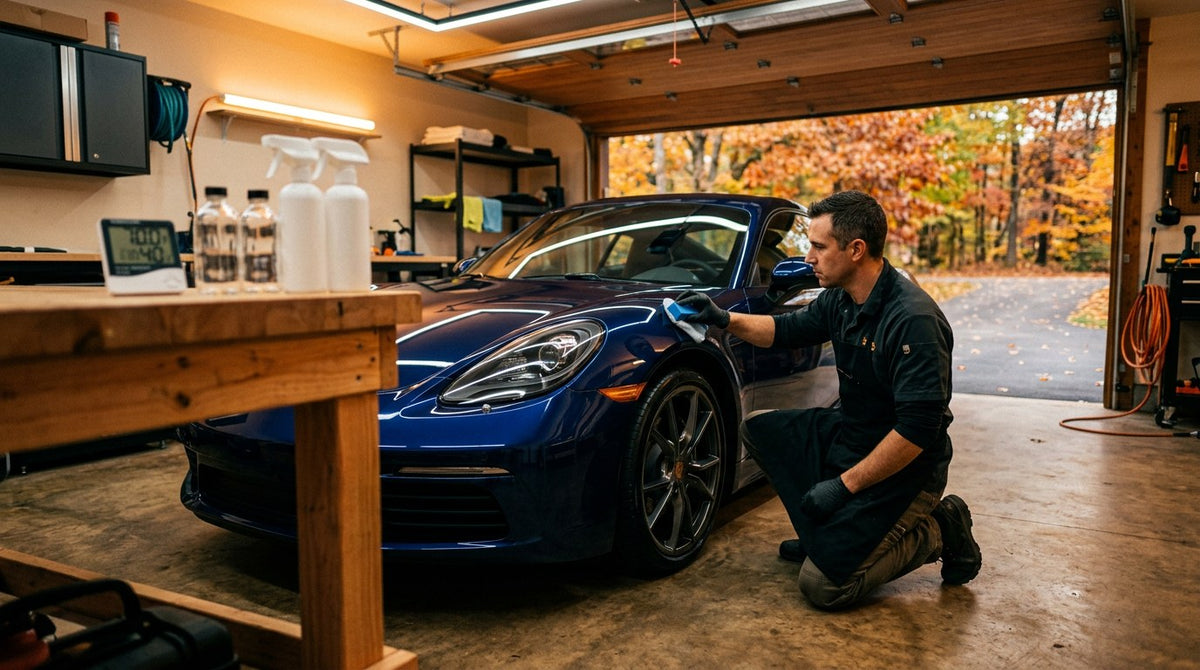
Ceramic coating applies best between 50°F and 85°F (10°C–29°C), with the ideal sweet spot at 60°F–80°F and relative humidity between 40% and 60%. Panel temperature matters more than air temperature — the paint must be cool to the touch, dry, above the coating's minimum temperature, and at least 5°F above the dew point to prevent condensation from ruining the bond. Apply outside these ranges and you risk streaks, high spots, hazing, slow curing, weak adhesion, and premature coating failure.
This guide covers the exact temperature and humidity windows for ceramic application, why cold and hot both cause failure, how to prep your garage for a proper fall application, dew-point math for outdoor work, panel-temp checks that pros use, cure-time changes at each temperature range, and step-by-step fall application procedure so your coating actually bonds and lasts as long as it should.
The Ideal Application Window at a Glance
Every ceramic coating has a specific temperature and humidity window in the technical data sheet. According to Dr. Beasley's cold-weather application guide, the typical acceptable range for most silica-based ceramic coatings is 50°F to 85°F. The sweet spot most detailers work in — where flash time, leveling, and cure all behave predictably — is 60°F to 80°F.
| Condition | Application Result | Recommendation |
|---|---|---|
| Below 50°F (10°C) | Coating thickens, poor spreading, slow curing, weak bond | Wait or move indoors and warm the space |
| 50–60°F (10–15°C) | Workable but slow flash time, longer wipe-off window | Adjust technique, allow extended cure |
| 60–80°F (15–27°C) | Ideal — proper flow, flash, and cure | Apply as normal |
| 80–85°F (27–29°C) | Fast flashing, high-spot risk | Work smaller sections, wipe faster |
| Above 85°F (29°C+) | Rapid solvent evaporation, streaks, poor leveling | Wait for evening or move to a shaded, cooler area |
| Humidity below 30% | Solvents evaporate too fast, coating can't self-level | Increase ambient moisture slightly or apply when humidity rises |
| Humidity 40–60% | Ideal — proper cure and bonding | Apply as normal |
| Humidity above 70% | Extended cure time, water spots, haze, weak bond | Dehumidify, warm the space, or wait for drier conditions |

Why Temperature Matters So Much for Ceramic Coating
Ceramic coating isn't like wax or sealant. It's a reactive chemistry — usually silica (SiO2), silazane, or polysilazane — that cross-links through solvent evaporation and hydrolysis reactions once applied to your paint. Both reactions are temperature-dependent, which is why every manufacturer publishes an application window.
What Happens When Temperature Is Too Cold
Below the coating's minimum temperature (usually 50°F for most consumer coatings, higher for some professional systems), Right Choice Detailing's bonding guide reports several failures:
- The coating thickens. Cold ceramic products get more viscous — they don't flow across the paint the way they should. You end up with uneven coverage, thin spots, and adhesion gaps.
- Flash time doesn't happen. The solvents that need to evaporate before you wipe off the coating don't leave the paint. The product sits wet on the surface, giving you a false read on when to level.
- Cross-linking stalls. The chemistry that makes a coating cure into a hard hydrophobic layer slows or partially halts. The finish stays soft, weak, and vulnerable.
- The coating never reaches full hardness. If it doesn't cross-link completely, it won't provide the scratch resistance, chemical resistance, or hydrophobic performance the product is rated for.
- Streaks and high spots appear. Cold conditions cause uneven leveling, so you're left with visible marks that can't be buffed off without stripping the coating.
What Happens When Temperature Is Too Hot
Above 85°F, the opposite problem — everything happens too fast:
- Solvents flash off almost instantly. The wipe-off window shrinks from 1–3 minutes to under 30 seconds on some coatings.
- High spots form fast. The coating hardens before you can level it, leaving visible ridges and streaks that require repolishing to remove.
- Poor leveling. The coating can't self-level because the solvents are already gone, giving you an uneven, textured surface instead of a smooth glass-like finish.
- Adhesion suffers. Rapid evaporation can trap solvent bubbles under the surface and weaken the bond to the clear coat.
What Happens With Wrong Humidity
Ceramic coatings are moisture-sensitive during application. Too much humidity causes streaking, hazing, and water spots as ambient moisture gets trapped in the coating. Too little humidity — under 30% relative humidity — causes solvents to evaporate too fast, mimicking the hot-weather problem. The sweet spot is 40–60% relative humidity for most silica-based coatings.
Panel Temperature vs Air Temperature
Air temperature is what your thermostat reads. Panel temperature is what your paint is at when the coating touches it — and this is what matters for cure. On a 65°F fall afternoon, a dark-colored hood sitting in direct sun can easily reach 100°F+ even though the air feels cool.
The check every pro uses: touch the paint with the back of your hand. If you can hold it there comfortably, the panel is cool enough to coat. If it feels warm or hot, wait — or move to shade.
The Dew Point Rule
Panels must be at least 5°F above the dew point to prevent condensation from forming during application. If the air is 55°F with 80% humidity and the dew point is 49°F, a cool metal panel sitting overnight in an unheated garage can drop below the dew point and grow invisible surface moisture that ruins your coating's bond.
Check the dew point (weather apps show it) before coating in cool or humid conditions. If the panel temperature is close to or below dew point, warm the panel — bring the car indoors and let it come up to garage temperature for a few hours before you start.

Fall Is a Great Time to Coat — With the Right Prep
Fall is one of the best coating windows of the year in most US climates. September through mid-October daytime highs land squarely in the ideal 65–80°F range across most of the country, humidity moderates from summer highs, and applying in fall means your coating protects paint through winter's road salt and grime before the first freeze forces you indoors permanently.
Why Fall Beats Summer for Coating
- Cooler panel temperatures. Dark panels don't hit 130°F+ in mid-afternoon, so the wipe-off window stays predictable.
- Moderate humidity. Fall humidity typically averages 55–60% in most regions, close to the ideal cure window.
- Longer working time. Cooler air gives you 2–4 minutes of flash time instead of the 30–60 seconds you might get in high summer.
- Protection when it matters. Coating before winter means your paint enters road-salt season with a hydrophobic barrier already bonded.
When Fall Becomes a Problem
- Late fall cold snaps. Once daytime highs drop below 55°F, outdoor application becomes unpredictable.
- Overnight temperature swings. Cold nights can drop panel temperatures well below dew point by morning. Never coat first thing in the morning without warming the vehicle indoors first.
- Fall rain and dew. Cure requires 24–48 hours minimum of dry conditions. Fall storms and heavy morning dew can wreck a fresh coating.
- Leaves and debris. Fall trees drop debris that can stick to fresh coating during the cure window. Cover or shelter the vehicle for at least 12–24 hours after application.
How to Coat Successfully in Cool Weather
If your garage isn't heated and you're coating in fall, follow this sequence to keep everything in the ideal window:
Step 1: Warm the Space
Bring the garage temperature to 65–75°F for at least 4–6 hours before starting. Portable propane or electric heaters work — just make sure the space is ventilated and the heater isn't blowing directly on the vehicle. According to Detail King's fall coating guide, keeping the working space between 60°F and 75°F with humidity below 50% gives you ideal application conditions.
Step 2: Warm the Vehicle
Bring the vehicle inside and let panel temperatures equalize with the garage for at least 2 hours before touching it with product. Metal panels have significant thermal mass — a car parked outside at 45°F needs time to warm to 65°F even in a heated garage.
Step 3: Confirm Conditions With a Meter
A cheap digital hygrometer/thermometer (around $15–20) is one of the best investments a DIY coater can make. Set it on the workbench where you'll be applying. Confirm:
- Air temperature 60–80°F
- Relative humidity 40–60%
- Panel temperature within the same range as air (cool to the touch, not cold)
- Dew point at least 5°F below panel temperature
Step 4: Prep the Paint Properly
Every fall coating job needs the same prep as a summer job — and cool weather makes prep even more important because contaminants are easier to miss under lower light. Full prep sequence:
- Wash with a pH-neutral, coating-safe shampoo like Undrdog Soap
- Iron decontamination with The Purps iron and fallout remover to strip embedded metal contaminants that summer driving left behind
- Clay bar or clay mitt to remove bonded contamination (tree sap, honeydew, industrial fallout)
- Paint correction if needed — polish out swirls and marring from summer washes
- IPA wipe or panel prep to strip polish oils and give the coating a clean surface to bond to
Step 5: Apply in Small Sections
In cool weather, section size matters. Work no larger than a 2x2 foot area at a time. Cross-hatch pattern: horizontal passes first, then vertical, then horizontal again to ensure full coverage without over-application.
Step 6: Watch the Flash
Flash time — the moment when the coating develops a rainbow haze on the surface indicating solvents have evaporated — extends in cool conditions. Instead of the 60–90 seconds you'd see at 75°F, expect 2–4 minutes at 55–60°F. Wait for the flash, then level immediately with a clean flat-weave microfiber. Don't try to accelerate it with a heat gun on a coated panel — you'll cause high spots.
Step 7: Extended Indoor Cure
Keep the vehicle inside for at least 12–24 hours after application to let the initial cure set. Water, dirt, dust, and dew during this window will bond into the coating and create defects that can't be buffed out. Full cure to hardness typically takes 5–14 days for most coatings — see our ceramic coating cure time guide for a full breakdown of what to avoid during each cure stage.

What to Do If You Can't Meet Ideal Conditions
Not everyone has a heated garage. If fall temperatures are dropping and you can't get the space to 60°F+, you have three practical options:
Option 1: Rent Garage Time
Many detailers, mechanics, and auto shops rent bay time by the hour. A $50–100 bay rental for a Saturday morning gets you into a heated space with proper lighting — a much better investment than a failed DIY coating that needs to be stripped and redone.
Option 2: Use a Coating-Safe Sealant Instead
If you can't hit ceramic application windows before winter, apply a durable spray sealant or a hybrid ceramic spray sealant as a temporary protection layer. Spray sealants tolerate a wider application range than full ceramic coatings and last 3–6 months, bridging the gap until spring when you can apply a proper ceramic.
Option 3: Wait for Spring
An unprotected winter with regular washes is better than a botched coating that has to be stripped and redone. If conditions won't work, wait for consistent 60°F+ spring weather and coat then. According to CCA Detailing's seasonal analysis, cold conditions can extend curing time by up to a week — a spring application at ideal conditions is faster and more reliable than trying to force a fall application.
How Undrdog Coatings Fit the Temperature Discussion
HCC (Hybrid Ceramic Coating) is Undrdog's flagship all-surface hybrid ceramic — the recommended option for most DIY applications on cars, boats, planes, and bicycles. HCC follows the standard silica-based application window: 50–85°F ambient, 40–60% humidity, cool-to-touch panels, no direct sun. If you're new to ceramic application, HCC's forgiving flash time and easy leveling make it a strong first coating for a fall application session in a properly prepped space.
Undrdog Pro and Pro Plus follow similar application windows but are more sensitive to humidity — pros using these products often prefer 45–55% RH in the working space. Always read the technical data sheet for the specific coating you're using and follow the manufacturer's temperature and humidity specifications rather than a generic range.
Get your paint protected before winter hits.
HCC is Undrdog's flagship hybrid ceramic — forgiving flash time and easy leveling that make a proper fall application straightforward in any well-prepped garage. Works on cars, boats, planes, and bicycles.
Shop HCC →Ceramic Coating Application Temperature FAQ
What temperature is best for applying ceramic coating?
Between 60°F and 80°F (15–27°C) with relative humidity between 40% and 60% is the ideal range for most silica-based ceramic coatings. This window gives you predictable flash time, proper leveling, and full chemical cross-linking during cure.
What is the minimum temperature to apply ceramic coating?
50°F (10°C) is the standard minimum for most consumer ceramic coatings, though some professional coatings require 60°F or higher. Below 50°F, the coating thickens, cross-linking slows dramatically, and the bond may fail entirely. Always check the technical data sheet for your specific product.
Can you apply ceramic coating in cold weather?
Yes, but only in a heated indoor space. Professional detailers apply ceramic coatings year-round in climate-controlled bays kept at 60–75°F. Applying in an unheated garage below 50°F leads to streaks, hazing, weak bonding, and premature coating failure.
Does humidity affect ceramic coating application?
Yes, significantly. High humidity (above 70%) traps moisture in the coating during cure, causing water spots, hazing, and weaker bonds. Low humidity (below 30%) makes solvents flash off too fast, preventing proper self-leveling. Ideal humidity is 40–60% relative humidity.
How do I check panel temperature before coating?
Touch the paint with the back of your hand. Cool to the touch means the panel is ready to coat. Warm or hot to touch means wait or move to shade. An infrared thermometer gives you an exact reading for around $20 and takes the guesswork out of dark panels in sunlight.
What is dew point and why does it matter for coating?
Dew point is the temperature at which moisture condenses out of air onto surfaces. If your panel temperature is at or below dew point, invisible surface moisture forms even without visible dew. Coating over that moisture causes hazing, adhesion failure, and defects. Panels should be at least 5°F above the current dew point.
Can I use a heater to warm the garage for coating?
Yes, portable propane or electric heaters work as long as they are ventilated properly and not blowing directly on the vehicle. Warm the space and vehicle for at least 2–4 hours before starting so panel temperatures equalize with air temperature.
How long should I keep the car inside after applying ceramic in cold weather?
At least 12–24 hours indoors for initial cure. In cool conditions, this window can extend to 24–48 hours because cross-linking slows at lower temperatures. Full cure to design hardness typically takes 5–14 days regardless of application temperature.
Is fall a good time to apply ceramic coating?
Yes, early to mid fall (September through early October in most US climates) is one of the best coating windows of the year. Daytime highs land in the ideal 65–80°F range, humidity moderates from summer highs, and applying before winter means your paint enters road-salt season protected.
What happens if I apply ceramic coating outside the recommended temperature range?
Below the minimum: coating thickens, flash time never triggers, cross-linking stalls, streaks form, bond weakens, and the coating may not provide its rated protection or lifespan. Above the maximum: solvents flash too fast, high spots form, leveling fails, and adhesion suffers. Both failures typically require full coating removal and reapplication.

Leave a comment
This site is protected by hCaptcha and the hCaptcha Privacy Policy and Terms of Service apply.