


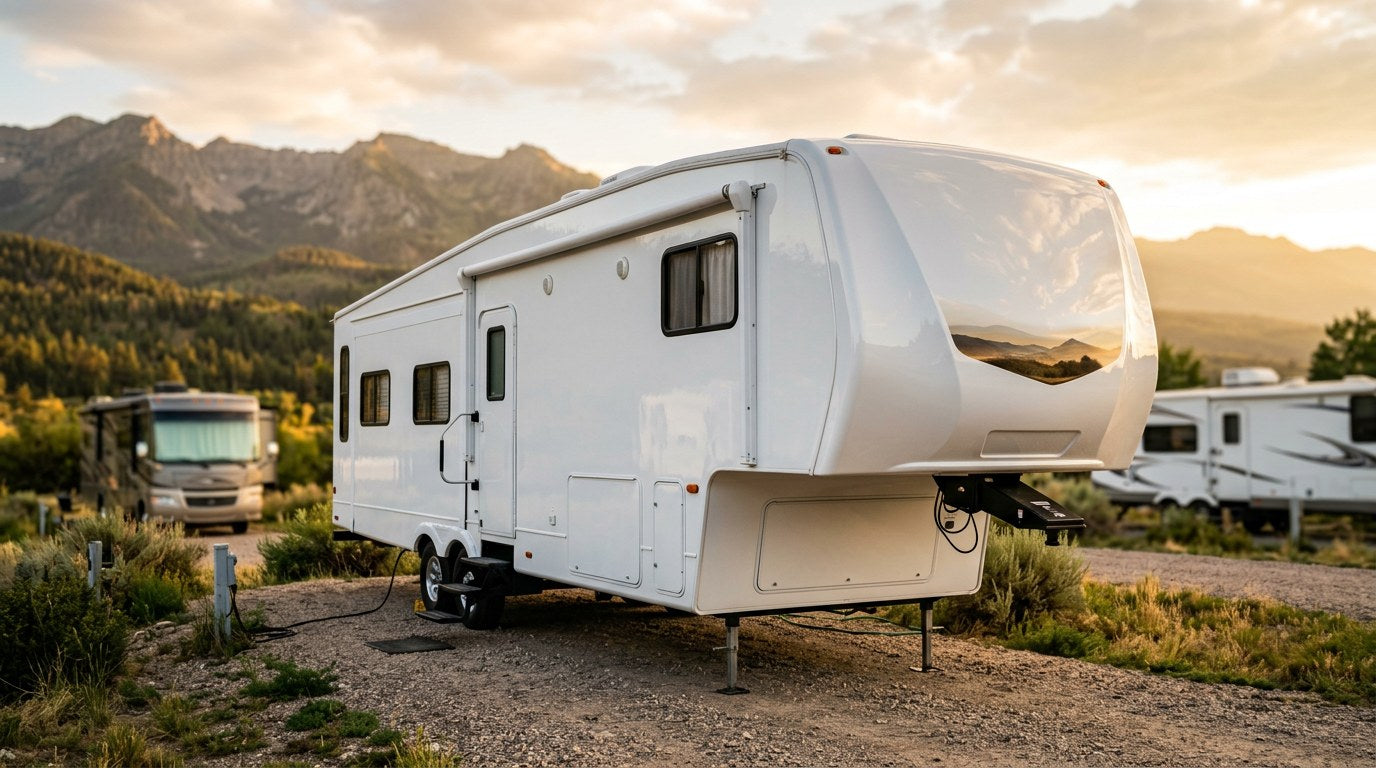
Fifth wheels and travel trailers spend more time sitting in the sun than most cars will in a decade — that's why the fiberglass front cap, painted aluminum sidewalls, and gel-coated fenders oxidize, chalk, and lose gloss faster than you'd expect. A properly prepped ceramic coating stops that cycle by adding a hydrophobic sacrificial layer that shrugs off UV, tree sap, road film, and hard-water spotting for two to five years per application. This is the full end-of-season workflow: what to coat, what to skip, how to prep a rig that's already oxidized, and how to keep the coating alive with the right wash routine.

Why Ceramic Coating Makes More Sense on an RV Than on Your Daily Driver
Your car probably lives in a garage overnight, sees maybe 15,000 miles of sun a year, and gets washed regularly. Your fifth wheel sits outside almost 100% of its life. According to the EPA UV Index scale, an RV stored uncovered in the Southwest or Florida absorbs UV exposure comparable to being on a beach 8 hours a day for years on end — the fiberglass gel-coat and painted panels take a beating you can measure with a gloss meter after just one season.
The result is the classic RV problem: a two-year-old rig that looks ten. Chalky white sidewalls that can't be wiped clean. A front cap that used to reflect the campground and now looks like unfinished drywall. Black streaks running down from every seam because the oxidized surface is now porous and grabs every drop of dirty rain.
A ceramic coating is the fix that also functions as a maintenance shortcut. Once the surface is polished back to gloss and sealed, washes take a fraction of the time, bug residue rinses off with pressure alone, and black streaking essentially stops. The RV Industry Association reports the average travel trailer changes hands after 5–7 years — a well-maintained exterior directly protects that resale value.
What Surfaces on a Fifth Wheel Actually Take a Ceramic Coating
An RV isn't one material — it's four or five. Each takes coating differently, and knowing what to coat versus what to skip is half the job.
Yes, coat these:
- Fiberglass front cap — the smooth, high-gloss curved section on the front of a fifth wheel or the nose of a travel trailer. This is the single most valuable surface to coat because it takes the most direct sun and wind exposure and shows the most gloss loss.
- Painted aluminum sidewalls — modern high-gloss sidewalls behave almost identically to a car's clearcoat and love a ceramic coating.
- Gel-coated fiberglass sidewalls — common on higher-end trailers. Behaves like a boat gel-coat and benefits enormously from a coating after compounding.
- Fiberglass fenders and wheel skirts — high road-film and tar exposure. Coating makes cleaning trivial.
- Painted or gel-coated slide-out fascias — coat the exterior face; skip the rubber seals and the sliding tracks.
- Exterior glass windows — a glass-specific coating (or the same ceramic in a very thin layer) cuts water spotting and haze.
- Chrome wheels and painted wheels — light layer for brake dust resistance.
No, skip these:
- Rubber (EPDM) or TPO roofs — these need a dedicated UV-blocking rubber roof treatment, not a hard silica coating.
- Vinyl decals and graphics — coating over a decal can trap solvents and cause lifting. Coat around them, or coat the decal only after decals are fresh and fully cured.
- Rubber slide-out seals and door seals — needs a dedicated seal conditioner.
- Awning fabric — needs a fabric-specific hydrophobic treatment.
- Anything textured — non-slip diamond plate, checker plate step surfaces, textured black plastic.
End-of-Season Prep: The 5-Step Process That Actually Lets a Coating Bond
Coating a chalky, oxidized RV without prepping it first is the fastest way to waste an afternoon and a bottle of ceramic. The coating bonds to whatever's on the surface — if that's dead oxidized gel-coat and hard-water minerals, that's what it locks in. Late-summer and early-fall storage prep is the ideal window because the trailer is coming off peak-use months and about to sit for the winter.

Step 1 — Thorough wash with a dedicated RV-safe pH-neutral soap
Skip the dish soap, skip the harsh degreasers. Wash top-down with Undrdog Soap and a lamb-wool wash mitt or brush. Use a two-bucket method to avoid grinding grit into the fiberglass. A pH-neutral pre-coating wash removes surface contamination without stripping any waxes you want to remove separately in the next step. See our full breakdown at why pH-neutral matters for a coating prep wash.
Step 2 — Iron and fallout decontamination
Every trailer that's been down the highway has iron deposits from brake dust and rail-brake fallout embedded in the fiberglass. Spray the sidewalls with The Purps Iron & Fallout Remover, let it dwell 3–5 minutes until it turns purple, then rinse. Do this on cool panels out of direct sun. The full workflow is documented in our 4-step paint decontamination guide — the same process applies to an RV surface.
Step 3 — Clay-bar or clay-mitt the smooth surfaces
After chemical decon, a clay mitt with quick-detailer lube removes any bonded surface contamination that survived the iron remover. Do the front cap, sidewalls, and fenders. You should feel the surface transition from gritty to glass-smooth. Do not clay decals or textured plastic.
Step 4 — Correct or polish the oxidized areas
This is where most DIY RV coatings fail — skipping this step. Oxidized fiberglass is dead surface material, and coating it just seals the dead layer in place. If the front cap has visible chalking (rub a finger across it — if it leaves a white powder, it's chalked), you need to compound and polish it back to a live, glossy surface first.
A dual-action polisher with a wool cutting pad and a moderate-cut compound clears the chalking. Follow with a foam polishing pad and a finishing polish for gloss. Not sure which polisher makes sense? Our full breakdown of DA vs rotary polishers for DIY paint correction covers exactly which tool to buy and why.
Step 5 — Final panel wipe
Before coating, wipe every surface with a dedicated panel-prep spray or 15% isopropyl alcohol on a clean microfiber. This removes any polishing oils that would otherwise sit between the surface and the coating and prevent a proper bond.
Applying the Coating: HCC on Fiberglass, Aluminum, and Gel-Coat
HCC Hybrid Ceramic Coating is the recommended flagship for full-RV work — it's the same coating we recommend for cars, boats, planes, and bicycles, so it handles every smooth surface on a fifth wheel from one bottle. Apply in a shaded area at ambient temperatures between 55°F and 85°F on cool panels. Direct sun on hot fiberglass will flash the coating before you can level it.

Application workflow
- Work in 2 ft × 2 ft sections at a time.
- Load a suede microfiber applicator wrapped around a foam block with 6–8 drops of HCC.
- Apply in overlapping vertical strokes, then horizontal strokes over the same section (cross-hatch pattern).
- Watch for the rainbow flash — a subtle interference sheen that appears as the coating starts to bond.
- Wait 45 seconds to 2 minutes (adjust for temperature — hotter means shorter flash time), then level with a clean plush microfiber. Immediately follow with a second clean, dry plush microfiber for a final buff.
- Move to the next section and repeat. Front cap first (hardest surface), sidewalls next, fenders last.
Full curing timeline: initial cure is complete within 12–24 hours (no water contact during this window), and the coating reaches full hardness at around 7 days. Our detailed guide on the HCC ceramic coating curing timeline covers exactly what to avoid during each cure stage.
Fifth Wheel vs Travel Trailer vs Motorhome: What's Different
All three take a coating, but the surfaces and workflow differ enough to plan for.
| Rig Type | Primary Surface | Toughest Section | Approx. Coating Time (Solo) | HCC Bottles Needed |
|---|---|---|---|---|
| 30–35 ft Travel Trailer | Painted aluminum sidewall | Front rock guard area | 6–8 hrs prep + 3–4 hrs coating | 1 |
| 35–40 ft Fifth Wheel | Fiberglass front cap + gel-coat sides | Upper front cap (need a ladder) | 10–14 hrs prep + 5–6 hrs coating | 1–2 |
| Class A Motorhome (35–45 ft) | Full-body paint or gel-coat | Roof line + slide fascias | 14–18 hrs prep + 6–8 hrs coating | 2 |
| Class C Motorhome (28–32 ft) | Mixed fiberglass + painted cab | Cab-to-coach seam | 8–10 hrs prep + 4–5 hrs coating | 1 |
Maintenance: How to Not Kill Your Coating in the First 90 Days
A ceramic coating on an RV is only as good as the wash regimen after it cures. Get this part wrong and you'll be back to chalky sidewalls in eighteen months instead of enjoying multi-season protection.
Do this
- Wait 7 days before the first wash after coating application.
- Wash with a pH-neutral soap — Undrdog Soap or equivalent — top-down, two-bucket method, lamb-wool mitt.
- Dry with a leaf blower or a clean plush microfiber, top-down. Never let hard water air-dry on the panels.
- Every 8–12 weeks, or after any long trip, top up with Undrdog Quick Detail — spray, wipe, done. This layers fresh ceramic polymers on top of the base coating and dramatically extends life.
- Deal with hard water spots the same day they appear. If you already have them baked in, our Water Spot Remover takes them off without damaging the coating.
Never do this
- Never use dish soap on a coated RV — it strips the top-layer polymers.
- Never use a stiff-bristle brush intended for tires on the sidewalls.
- Never let bird droppings, tree sap, or bug guts sit on the coating for more than 24 hours. According to National Geographic reporting on bird droppings and paint damage, uric acid is aggressive enough to etch even coated surfaces if left long enough.
- Never pressure-wash within 6 inches of the coated surface — stay at least 18 inches back with a fan tip, never a rotating nozzle.
- Never park under a pine tree for storage — the sap is one of the most damaging contaminants an RV coating encounters.
Storage Prep: Why the Coating Alone Isn't Enough
Coating your RV before winter storage is the right move, but pair it with the rest of a good storage protocol. The NFPA's RV safety guidance emphasizes proper storage practices, and the exterior side of that list looks like this:
- Coat the exterior (this guide).
- Treat the rubber roof separately with a dedicated UV-blocking rubber roof treatment.
- Condition every slide-out seal, door seal, and window seal with a rubber-safe conditioner.
- Protect awning fabric with a fabric-specific hydrophobic treatment and leave awnings retracted.
- Cover tires with UV-blocking tire covers — tire sidewalls oxidize just like fiberglass.
- Never leave slides extended in storage — the exposed slide topper fabric ages fast in UV.
- Skip full RV covers if possible; if you must cover, use a breathable custom cover, never a plastic tarp.
The Real Return: What a $150 Coating Job Actually Saves You
Compare the numbers. A professional RV ceramic coating job runs $1,200–$3,500 depending on rig size and prep condition. A DIY workflow with proper prep tools and HCC comes in around $150–$300 for consumables. Either way, once the coating is on, you're looking at:
- Wash time cut by roughly 60%. A 45-minute rinse-and-quick-wash replaces a 2-hour scrub session.
- Product costs drop — you're using 30–40% less soap and no polymer sealant or wax between washes.
- Resale value protection. RVs with visible chalking, black streaking, or dull front caps get discounted heavily at trade-in. A protected exterior directly protects thousands of dollars of resale.
- Reduced professional detailing frequency. A coated rig needs a full detail every 18–24 months instead of every 6–8.
Ready to protect your fifth wheel or travel trailer for the next 2–5 years?
HCC Hybrid Ceramic Coating is the flagship all-surface coating for RVs, cars, boats, planes, and bicycles — one bottle covers everything smooth on your rig, from the fiberglass front cap to the painted aluminum sidewalls.
Shop Undrdog HCC →Frequently Asked Questions
How long does a ceramic coating last on a fifth wheel?
Depending on prep quality, storage conditions, and maintenance, expect 2–5 years of active protection from a properly applied ceramic coating like HCC. Rigs stored under cover or in mild climates trend toward the upper end; full-time RVs in Arizona or Florida sun trend toward the lower end.
Can I coat over old wax or a polymer sealant?
No. Any wax or sealant sitting on the surface prevents the ceramic from bonding to the fiberglass or paint. Do the full prep — wash, iron remover, clay, polish, panel-wipe — before applying any coating.
Do I need to compound my RV before coating it?
Only if the surface is oxidized or chalking. Rub a clean finger across the sidewall — if it comes away with white residue, the surface is dead and needs compounding before coating. A well-maintained rig with active gloss can go straight from decon to coating.
Can I ceramic coat the rubber roof?
No. Rubber roofs (EPDM and TPO) need a dedicated flexible UV-blocking roof treatment, not a hard silica ceramic. Applying a rigid ceramic to a flexible substrate will lead to micro-cracking. Coat the smooth exterior surfaces only.
How much HCC do I need for a 35-foot fifth wheel?
One 30 ml bottle of HCC will typically cover a 30–35 foot rig with careful application. For a 40-foot fifth wheel with a tall front cap or a Class A motorhome, plan on two bottles to avoid running out mid-application.
Can I ceramic coat vinyl RV decals?
Only if the decals are new and fully cured (typically 90+ days after install). Coating over old, aged, or lifting decals can trap solvents and accelerate lifting. When in doubt, coat around them.
Will a ceramic coating stop black streaks on my sidewalls?
It dramatically reduces them. Black streaks form when dirt runs off oxidized porous surfaces and sits. A coated hydrophobic surface releases the water and dirt before it can leave a streak. You'll still get occasional streaking from severe seam runoff, but it wipes off in seconds instead of scrubbing for minutes.
Can I apply HCC in direct sunlight on a hot RV panel?
No. Coat in shade with panel temperatures below 85°F. Direct sun on a hot fiberglass panel flashes the coating before you can level it, leaving high spots that are difficult to remove after cure.
How do I wash my RV between full detail sessions?
Rinse top-down, foam with pH-neutral Undrdog Soap through a foam cannon or two-bucket method, agitate with a lamb-wool mitt or brush, rinse, dry with a leaf blower or plush microfiber. Top up with Quick Detail every 8–12 weeks or after long trips.
Is a ceramic coating worth it if I only camp a few weekends a year?
Yes — arguably more so. Weekend campers store their rigs outside 95% of the year, so UV damage during storage is where the coating pays for itself. A rig used every weekend gets washed more often; a rig that sits in storage takes constant UV damage without any washing intervention to compensate.

Leave a comment
This site is protected by hCaptcha and the hCaptcha Privacy Policy and Terms of Service apply.