


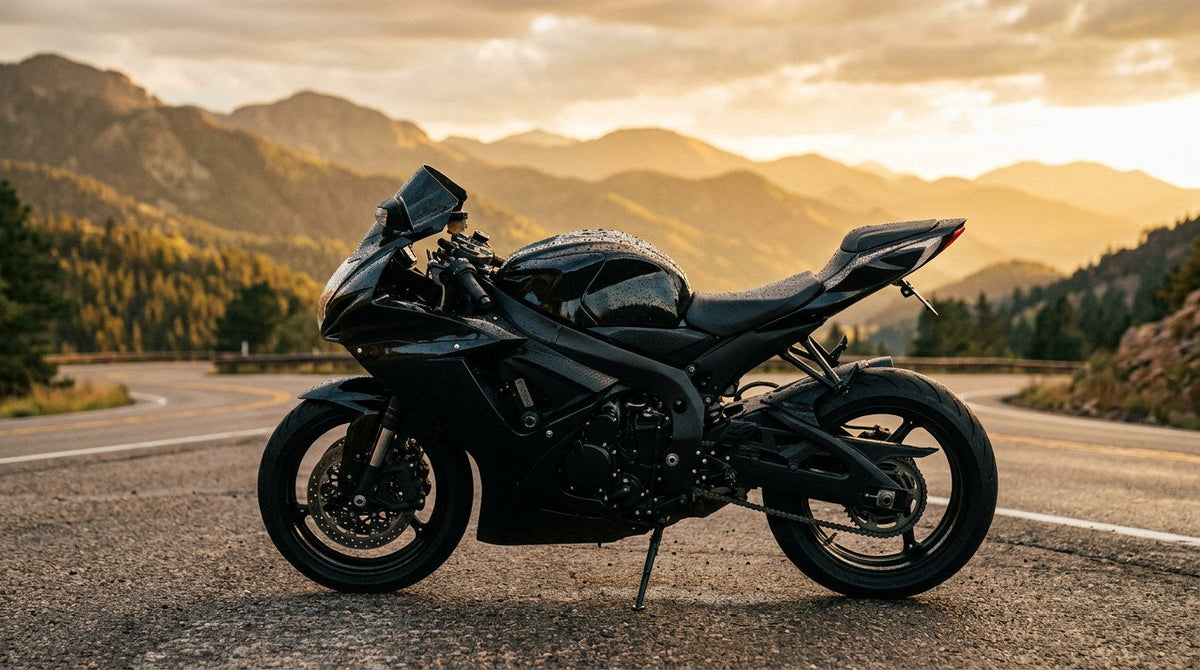
Motorcycle ceramic coating is a liquid SiO2 or hybrid polymer that bonds to your bike's painted panels, plastics, chrome, wheels, and windscreen to form a slick, hydrophobic, UV-resistant layer that lasts 2 to 5 years. On a motorcycle it does the same job it does on a car — repels water, sheds bugs and road grime, blocks UV fading, and resists chemical etching from chain lube, fuel spills, and bug acids — except a bike takes far more abuse per surface area than a car, so the payoff is bigger and the cleanup savings are dramatic.
This guide covers what motorcycle ceramic coating actually does, which parts of your bike to coat, exactly how to apply a DIY coating step-by-step, cure and break-in rules, real-world maintenance, whether DIY or pro is right for you, and how to pick the right coating for the way you actually ride.
What Ceramic Coating Does on a Motorcycle
A ceramic coating is a clear liquid polymer — usually silicon-dioxide (SiO2) based, sometimes with titanium-dioxide or graphene additives — that chemically bonds to your bike's factory clear coat and other compatible surfaces. Once cured, it forms a semi-permanent glass-like layer that sits above the paint and takes the abuse instead of the paint itself. According to Gilroy Blackout's motorcycle coating guide, professionally applied motorcycle coatings typically last 2 to 5 years depending on ride frequency and storage.
The Core Benefits
- Hydrophobic surface — Water, road spray, and rain bead up and roll off, meaning fewer water spots and easier drying
- UV protection — Blocks the sun damage that fades tanks, fairings, and black plastic trim (bikes are exposed 100% of ride time — no glass in the way)
- Chemical resistance — Chain-lube fling-off, small fuel spills, bug acids, and bird droppings can't etch the coated surface as easily
- Easy cleanup — Bug splatter releases with a rinse and light wipe instead of scrubbing
- Enhanced gloss — Adds visible depth and richness to paint, especially metallic and candy colors
- Light scratch resistance — Adds a harder layer above the clear coat that shrugs off light abrasion (jacket zippers, tank bag friction). Coatings are not scratch-proof.
Biketailing's coverage of motorcycle ceramic coating notes the practical maintenance win: a coated bike that comes home from a 200-mile bug-covered ride cleans up in about 15 minutes with a rinse and wipe instead of 45 minutes of scrubbing.

Which Parts of Your Motorcycle to Coat
A bike is not one surface — it's a dozen surfaces made from different materials, and each responds a little differently to a ceramic coating.
| Component | Coating Benefit | Priority |
|---|---|---|
| Fuel tank | Fuel spill resistance, scratch protection, deep gloss | Essential |
| Painted fairings and panels | Bug/debris protection, UV block | Essential |
| Windscreen | Rain repellency, improved visibility, cleaner bug removal | High |
| Wheels (painted or machined) | Brake dust releases with rinse, easier cleaning | High |
| Chrome exhaust and covers (fully cool) | Fingerprint resistance, easier cleaning, mild corrosion resistance | Medium |
| Black plastic trim | UV protection, prevents fading and chalking | Medium |
| Fork tubes (upper only) | Road spray protection, easier cleanup | Medium |
| Frame / subframe (if exposed) | Road spray, chain-fling resistance | Optional |
| Engine cases (polished or painted) | Corrosion resistance, easier cleanup | Optional |
Don't coat: hot exhaust headers (bake the coating before it cures), seat covers, rubber grips, brake rotors and pads, the chain, or bare unfinished aluminum that isn't clear-coated.
Motorcycle vs Car Ceramic Coating: What's Actually Different
The chemistry is the same. The workflow, prep, and product choice are different.
- More material variety per bike. One bike has painted panels, plastic trim, chrome, aluminum, and windscreen material — all in a small area. A truly complete job uses a coating that's rated for all of those surfaces, or two compatible coatings applied to different zones.
- More surface curvature per square foot. Fairings, tanks, and headlight housings have tight compound curves. Small pads, careful sectioning, and short passes matter more.
- Higher UV exposure per ride hour. No windshield glass filtering UV, no roof, no shade. UV inhibitors do more work per year.
- Chain lube and fuel drips are constant threats. A car doesn't fling oil onto its own paint every mile. A chain-driven bike does — every time. Coating helps that fling wipe off instead of etching in.
- Storage matters more. Garaged bikes push coating life toward the 4–5 year end of the range. Bikes stored outside without a cover push toward the 2-year end.
How to Apply Ceramic Coating to a Motorcycle: Full Step-by-Step
Step 1: Wash and Strip Old Wax
Start with a full bike wash using a pH-neutral, coating-safe soap. Undrdog Soap is coating-safe and effective on motorcycle surfaces. If the bike has any existing wax, sealant, or spray-on protection, use a dedicated paint prep or IPA (isopropyl alcohol) wipe-down after washing to strip it — a coating won't bond correctly through wax residue.
Step 2: Decontaminate the Painted Surfaces
Wash removes surface dirt. Decon removes what's stuck IN the clear coat. Two-step process:
- Iron remover: Spray The Purps Iron & Fallout Remover onto wheels, fairings, tank, and any painted surface. The solution turns purple where it reacts with embedded iron particles from brake dust and rail dust. Rinse thoroughly.
- Clay bar: Lubricate the clean surface with detail spray or soapy water and glide a clay bar across every painted panel and the fuel tank. You'll feel it drag over embedded contamination and then glass-smooth over. For the full decon workflow, see our how to decontaminate car paint 4-step guide — the process is identical on a bike.
Step 3: Paint Correction (If Needed)
Many bikes benefit from a light polish before coating to remove swirl marks, water spots, and minor scratches. Whatever you polish INTO the paint is locked under the coating for years — do the correction now, not after. On tight fairing curves, a small 3-inch dual-action polisher with a fine finishing pad is easier to control than the 5–6 inch pads used on cars.
Step 4: Wipe Down With IPA or Panel Prep
Polish leaves oils and residue that block coating adhesion. A 15–20% IPA solution or dedicated panel prep, wiped down with a clean plush microfiber, removes those oils. The surface should look completely bare and matte-clean when you finish.
Step 5: Apply the Coating in 12" x 12" Sections
Environment: 60–80°F, low humidity, out of direct sun, and out of any wind that carries dust. For the full application-temperature breakdown, see our ceramic coating application temperature guide. Application steps:
- Fold a fresh microfiber applicator over a small foam suede-topped block
- Apply 4–6 drops of coating to the pad — never directly to the bike
- Work in 12" x 12" sections (a tank top might be one section, each side one section, each fairing panel one section)
- Apply in an overlapping crosshatch pattern: 3–4 side-to-side passes, then 3–4 up-and-down passes over the same area
- Wait for the flash: the coating will look glossy and then start to develop a slight rainbow oil-slick or hazy sheen — this is your cue to buff
- Buff with a plush, low-nap microfiber in straight lines using very light pressure. Flip to a fresh dry microfiber for a second pass
- Move to the next section

Step 6: Application Order
Work top-down and back-to-front so you're not leaning over freshly coated panels:
- Windscreen and mirror backs
- Upper fairings and headlight surround
- Fuel tank
- Side fairings and tank side panels
- Tail section, seat cowl, rear fender
- Lower fairings, belly pan
- Wheels (front, then rear — hardest to reach last)
- Chrome and exhaust covers (fully cool only)
Step 7: Cure Time and Break-In
Cure rules for motorcycle ceramic coating are stricter than for cars because a bike has no cabin to block wind, splash, or dust:
- Initial cure: 4–6 hours before you can even touch the surface
- Safe to touch: 24 hours
- Light ride only: 48 hours minimum, dry weather, no highway speeds
- First wash: 7 days minimum, longer if humidity has been high
- Full chemical cure: 7–14 days depending on temperature and humidity
- Do not cover the bike during initial cure — a cover can imprint the coating
- Avoid rain, dew, and hose water for the first 24–48 hours minimum
For the complete cure-time breakdown across water, washing, and real driving, see our ceramic coating cure time guide.
Water Beading, Slick Feel, and How to Know It's Working
Two visual cues tell you the coating bonded correctly:
- Water beads and rolls off in tight round drops. Not sheets. Not flat puddles. Tight round beads that roll off with the slightest tilt.
- The surface feels slick under a clean microfiber. A properly coated tank feels like it's frictionless — the towel glides instead of drags.

DIY vs Professional Motorcycle Ceramic Coating
| Factor | DIY (Undrdog HCC or Pro) | Professional Shop |
|---|---|---|
| Cost | $60–$120 for the coating, plus prep products you may already own | $300–$800+ depending on bike, prep needed, shop, and number of coats |
| Time investment | 4–8 hours for a full-fairing bike, less for a naked | Drop off, pick up in 1–3 days |
| Durability | 1–3 years typical from consumer coatings | 2–5+ years with multi-layer application |
| Prep quality | Depends on your effort and tools | Includes full paint correction as standard |
| Warranty | Product-level only | Often 2–5 year workmanship warranty |
| Best for | Riders who enjoy the process and want $ savings | New-bike protection, show bikes, no-hassle option |
For a full DIY vs pro breakdown that applies to bikes too, see our DIY vs pro ceramic coating guide.
Picking the Right Coating for the Way You Ride
Not every bike needs the same protection.
Daily Commuter, Rides in All Weather
HCC (Hybrid Ceramic Coating) is Undrdog's flagship all-surface hybrid — designed to bond to paint, plastic, chrome, and metal on cars, bikes, boats, planes, and bicycles. A single-product answer for a motorcycle with mixed surfaces. Easy DIY application, deep gloss, strong hydrophobic behavior, and 1–2 year durability with regular use.
Weekend Warrior, Garaged, Wants Maximum Protection
Undrdog Pro is the more aggressive DIY ceramic coating for painted surfaces. Longer durability than HCC on paint, higher gloss, and more chemical resistance — the pick if you want the strongest DIY option and the bike is stored inside.
Show Bike, Custom Paint, No Compromises
Undrdog Pro Plus is the top-tier DIY option, formulated for high gloss and maximum durability. See our Undrdog Pro deep dive for a full breakdown of when to step up from HCC to Pro or Pro Plus.
Quick Between-Wash Refresh
Quick Detail Hydrophobic Spray is a spray-on topper that boosts water beading and gloss between full coating applications — great for post-ride wipe-downs and to keep the coating happy through the season.
Maintenance: Keeping the Coating Alive
- Wash every 1–2 weeks during riding season. Two-bucket method, coating-safe soap, soft microfiber wash mitt, rinse thoroughly.
- Never wash in direct sun or on a hot surface — water dries too fast and leaves mineral spots that etch into the coating over time.
- After every ride if the bike is filthy: a quick rinse before the bugs and grime bond hard.
- Skip automatic car washes with brushes. Brushes fill with grit and act like sandpaper on your coating.
- Refresh with a hydrophobic topper every 4–8 weeks to keep water beading strong.
- Address bird droppings, tree sap, and bug splatter within 24 hours. Coatings resist these — they aren't immune to them, especially in high heat.
Ready to coat your bike?
HCC is Undrdog's flagship hybrid ceramic — the single-product answer for a motorcycle with mixed paint, plastic, chrome, and metal surfaces. One-pass DIY application, cinematic gloss, strong bead, and years of hydrophobic protection.
Shop HCC →Motorcycle Ceramic Coating FAQ
Is ceramic coating actually worth it on a motorcycle?
For most riders, yes. Bikes take more UV, bug impacts, chain-lube fling, and road grime per surface area than cars do. A coating cuts cleanup time dramatically, blocks the UV damage that fades tanks and plastics, and adds visible gloss. The payoff is bigger per dollar than on a car.
How long does motorcycle ceramic coating last?
DIY consumer coatings typically last 1–3 years. Professionally applied multi-layer coatings can last 2–5 years. Garaged bikes push toward the long end of that range. Bikes stored outside push toward the short end.
Can I ceramic coat a matte or satin finish motorcycle?
Yes, but you need a matte-safe coating. Standard glossy ceramic coatings will add gloss to a matte finish and change the look. Look for a coating specifically labeled matte-safe or matte-compatible before applying to satin or matte paint.
Can I coat chrome exhaust pipes?
Only when the pipes are completely cold. Coating a warm exhaust will flash-cure the product before you can buff it and can leave permanent hazing. Coat right after a full wash with plenty of cool-down time and don't ride for the full cure period.
How much does professional motorcycle ceramic coating cost?
Ranges from about $300 for a small naked bike to $800+ for a large touring bike or full-fairing sportbike with full paint correction. Multi-year coatings and custom paint add cost. DIY with HCC or Pro is $60–$120 for the coating.
Do I have to polish my bike before coating?
Only if there are visible swirl marks, water spots, or scratches you want removed. A coating locks in whatever is under it — so if the paint looks perfect already, skip polishing and go straight to decontamination and IPA wipe-down. If the paint has flaws, polish first.
Can ceramic coating protect from crashes or gravel chips?
No. A coating is microns thick — it can shrug off light abrasion, brake dust, bug splatter, and UV. It cannot stop a rock chip or a slide. For that level of impact protection you need paint protection film (PPF).
How soon can I ride after applying ceramic coating?
48 hours minimum for a light dry-weather ride. 7 days minimum before the first wash. Full chemical cure takes 7–14 days depending on temperature and humidity. Do not ride in rain or through car washes during the cure period.
Will ceramic coating make bug removal easier?
Significantly easier. Bugs that used to require scrubbing will release with a rinse and light wipe. Bugs left on the coating in high heat for many hours can still etch, though — a quick rinse after long rides is still the best practice.
Can I apply HCC on top of an existing ceramic coating?
Yes, if the existing coating is still bonded (water still beads and the surface still feels slick). You'll add gloss and refresh the hydrophobic behavior. If the existing coating has failed, wash and lightly polish to remove the old layer before applying fresh HCC.

Leave a comment
This site is protected by hCaptcha and the hCaptcha Privacy Policy and Terms of Service apply.