


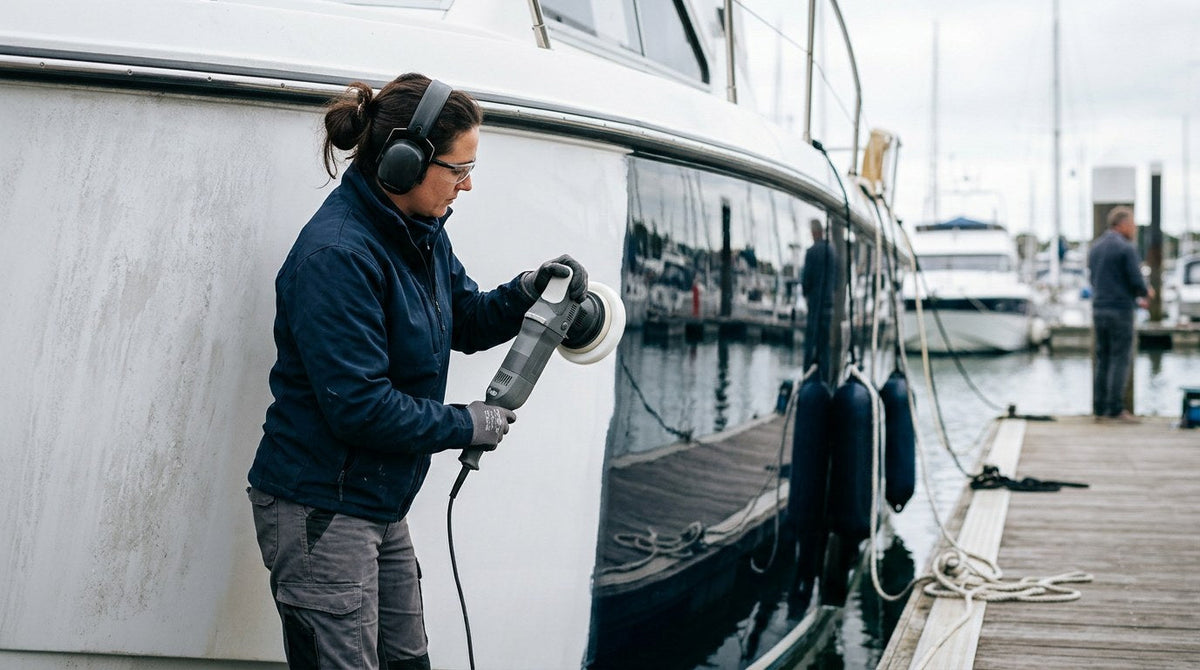
To polish a boat correctly, wash and dry the hull, assess how oxidized the gel coat actually is, then work through the right sequence for that condition — compound with a wool cutting pad for oxidation removal, follow with a foam polishing pad and a finishing polish for clarity, and seal with a marine wax, sealant, or ceramic coating so the shine actually lasts more than a weekend. Skipping steps or matching the wrong pad to the wrong compound is why most DIY boat polishing jobs come out swirled, hazy, or dull again within a month.
This guide walks through exactly how to polish a boat in 2026 — how to read your gel coat's condition before you touch a machine, which pad and compound combination actually matches light, moderate, or heavy oxidation, the crosshatch technique that keeps your cut even, the finishing polish step almost everyone skips, and the protection layer that determines whether all that work still looks good next season or is chalky again by August.

Why Gel Coat Oxidizes in the First Place
Gel coat is the outer resin layer that gives your fiberglass boat its color, gloss, and protection from moisture. It's tough — but it's the only thing between UV radiation and the fiberglass laminate underneath, and UV is relentless. Sunlight breaks down the polyester resin at a molecular level through a process called photo-oxidation, where UV energy snaps the polymer bonds in the top microlayer of gel coat and oxygen reacts with the damaged resin. The result: a dull, porous, powdery top layer that has lost its color depth and shine.
That powdery layer is what people call chalking. Wipe your hand across an oxidized hull and you'll see white or grey residue on your palm — that's degraded resin coming off. The longer it goes untreated, the deeper the damage penetrates, and the more aggressive your correction work has to be to get healthy gel coat back to the surface.
Salt, Storage, and Neglect Accelerate the Problem
UV is the main driver, but salt spray, mineral-heavy water, airborne pollutants, and infrequent rinsing all speed the process. Salt crystals trap moisture on the surface and hold water against the gel coat, giving oxygen more time to react with the resin. Storing a boat uncovered in full sun without any protective coating on the hull is the fastest way to burn through gel coat.
Signs Your Gel Coat Needs Polishing (Not Just Waxing)
- Chalky white residue transfers to your fingers, wash mitt, or towel
- Color looks flat and dull in the shade, even after washing
- Water no longer beads — it sheets and sits
- Wax you apply disappears within a couple of trips
- Fine scratches, swirl marks, or hard water spots that don't wash off
If any of those are true, waxing alone won't fix it. Wax sits on top of oxidized gel coat and hides very little. You have to remove the damaged layer first, then protect what's underneath.

Assess Your Gel Coat Before You Touch a Machine
The single biggest reason DIY boat polishing jobs fail is starting more aggressive than the condition requires. Gel coat is a finite layer — you can only take so much off before you're into the laminate — so the rule is: cut only as much as needed, then stop and refine.
Do this before you buy compound. Walk the hull from ten feet back in soft daylight, then again up close with your hand on the surface. Wipe a dry black or dark microfiber across a hidden panel. Do a test spot with your least aggressive product first and see what it does. Then classify:
Light Oxidation
Slight haze, color mostly intact, no significant chalking on your hand. Fine finishing polish plus a marine sealant or ceramic coating is enough. You do not need heavy compound.
Moderate Oxidation
Visible dullness, color is faded but recognizable, some chalking transfers to your hand. Medium-cut compound with a wool or aggressive foam pad, then a finishing polish, then protection.
Heavy Oxidation
Chalky white surface, color looks flat and washed out, obvious powder on contact. Heavy-cut compound with a wool pad, medium polish with a foam pad, finishing pad for gloss, then protection. If compound alone can't get through the damaged layer, you're into wet sanding territory.
Severe Damage (Wet Sanding Territory)
The gel coat feels pitted, uneven, or the color has worn through in patches. This is beyond a normal polish — you're wet-sanding through a grit progression (600 → 800 → 1000 → 1200 → 1500 → 2000) per the standard marine grit progression before compounding. If you've never wet-sanded gel coat, hire a pro for this one — you can burn through in seconds.
The Right Tools and Pads for Polishing a Boat
You do not need a professional detailer's shop to polish a boat well, but you do need the right pad-and-compound match. Here's the honest short list.
Polisher
- Dual-action (DA) polisher — safest choice for DIYers on gel coat. Harder to burn a panel. Great for medium oxidation and finishing. A quality 15mm or 21mm throw DA handles most hulls fine.
- Rotary polisher — faster cut, essential for heavy chalking, unforgiving. Only if you have experience with rotary technique and heat control. Not for a first-time boat polisher.
- By hand — realistic for light oxidation, small areas, or touch-up. Not realistic for full hull sides on a moderately oxidized boat.
Pads
- Wool cutting pad — for compounding heavy oxidation. Cuts the fastest, generates the most heat, leaves the most correction marks that then need to be polished out.
- Aggressive foam cutting pad — for moderate oxidation on a DA. Less cut than wool but easier to control.
- Medium foam polishing pad — for the finishing polish step after compounding.
- Soft finishing foam pad — for the last gloss-refining pass and for applying sealant.
Compounds and Polishes
- Heavy-cut marine compound — abrasive, formulated for gel coat's harder surface (auto compounds are often too fine to cut chalking efficiently).
- Medium or finishing marine polish — clears the wool marks left by the compound and builds gloss.
- One-step cleaner polish — has a place on well-maintained boats with only light haze, but does not replace a full compound-and-polish sequence on chalky hulls.
Consumables
- 10–20 clean microfiber towels (color-code them: compound wipe, polish wipe, sealant buff)
- Marine-grade pH-balanced soap and two buckets
- Painter's tape for masking rubber trim, non-skid, and rub rail
- Spur or pad cleaning tool
- A bright inspection light
How to Polish a Boat: The Full 2026 Step-by-Step Sequence
This is the order that actually works. Skipping a step or doing them out of order is how you end up with a shiny-but-swirled hull or a compound job that dulls back down in a month.
Step 1: Wash the Entire Boat
Never polish a dirty boat. Any salt, grit, or grime sitting on the gel coat will get pulled into your pad and cut fresh scratches into the surface you're trying to fix. Rinse thoroughly with fresh water, then wash top-down with a pH-balanced marine soap like Undrdog Soap using a soft wash mitt and the two-bucket method — one for soapy water, one for rinsing your mitt so you're not putting grit back on the hull. Rinse fully and dry with clean microfibers or forced air.
Step 2: Decontaminate the Hull
If your boat has been in the water for a full season, expect bonded contamination beyond what soap removes — iron fallout from bunk carpet, tannin stains at the waterline, algae remnants, mineral deposits. Run a chemical iron remover like The Purps across the hull. It reacts with iron particles and rinses clean, so your polishing pad isn't dragging metal fragments across gel coat. Follow with clay if you still feel roughness on the surface after decon.
Step 3: Mask and Prep the Work Area
Painter's-tape any rubber trim, non-skid, vinyl, and hardware you don't want compound sling on. Cover through-hulls. Work in shade — direct sun heats the gel coat and makes compound flash too fast to work properly. Set up your polisher, pads, compound, and microfibers within arm's reach so you're not walking away mid-panel.
Step 4: Do a Test Spot
Pick the most sun-beaten section of the hull — usually the port or starboard side — tape off a two-foot square, and run your full planned process there before touching the rest of the boat. Compound, polish, wipe, inspect in direct light. This one test spot answers three questions:
- Is your compound cutting enough to remove the oxidation?
- Is your pad leaving the surface clear or hazed?
- Does the finish still look good after a proper wipe-down (not just wet with product)?
If the test spot works, replicate it across the boat. If it doesn't, adjust pad or compound aggression before you commit to the whole hull.
Step 5: Compound for Oxidation Removal
Break the hull into two-foot sections. Apply four small dots of compound to the pad face. Press the pad against the gel coat before turning the machine on — that keeps product from slinging across the boat. Turn on at low speed, spread the compound over the section, then bump up to your working speed.
The crosshatch pattern:
- Left to right with overlapping passes
- Up and down with overlapping passes
- One lighter final pass, keeping the pad completely flat
Keep the pad moving. Don't park in one spot — that's how you generate heat and burn gel coat. Use steady moderate pressure and let the pad and compound do the work. Wipe the section clean with a microfiber before moving on, and inspect in direct light. If oxidation is still visible after a wipe, do another pass with the same step before jumping to a more aggressive product.
Clean or swap your pad every panel or two. A pad loaded with spent compound and gel coat dust cuts less and hazes more. A spur cleans wool pads fast; foam pads can be brushed out with compressed air or rinsed and dried between uses.
Step 6: Polish for Gloss and Clarity
This is the step almost every DIYer skips — and it's why so many home boat polishing jobs look shiny in the sun but hazy in the shade. Compounding removes oxidation but leaves fine scratches and haze from the wool. Polishing removes those and builds actual depth.
Switch to a medium foam polishing pad and a finishing polish. Drop your speed one setting lower than you used for compounding. Use lighter pressure. Same crosshatch pattern, same two-foot sections, but the goal here is clarity, not cut. Work the polish until it breaks down and clears, then wipe with a clean microfiber and inspect. The reflections should sharpen visibly.
On darker gel coat colors or if you want a true mirror finish, add a third pass with a soft finishing foam pad and a light finishing polish for the last bit of gloss.
Step 7: Seal the Finish (This Is What Makes the Work Last)
Freshly polished gel coat has no protection. The oxidation removal opened the surface, and without a sealant or coating over it, UV will start breaking down the fresh resin within weeks. This is the step that separates a polish job that lasts a season from one that dulls back down before Labor Day.
You have three real choices for protecting polished gel coat, in ascending order of durability:
Wax vs Sealant vs Ceramic Coating for Boats
The right protection layer depends on how much work you want to redo per season and how the boat is stored and used.
| Protection | Typical Durability | Best For | Reapplication |
|---|---|---|---|
| Marine wax | 4–8 weeks | Weekly-use boats, sheltered storage | Every 1–2 months |
| Polymer sealant | 3–6 months | Regular-use boats, seasonal owners | Twice per season |
| Marine ceramic coating | 12+ months | Boats stored uncovered, hard use, chalking-prone hulls | Annual inspection, top-up as needed |
Wax is inexpensive and forgiving but you'll be reapplying it constantly. Sealant lasts longer with cleaner beading. A marine ceramic coating locks the polished surface behind a chemically bonded layer that resists UV, salt, and mineral spotting far longer than either — which is the whole point after you just spent a weekend polishing. If you want the full breakdown on how those three finishes actually perform over a season, the boat wax vs ceramic coating vs polymer sealant guide compares them head-to-head.
Which Undrdog Coating for a Freshly Polished Hull
Undrdog Marine is the DIY-friendly marine ceramic built for polished gel coat and freshly restored fiberglass. Apply it in a single-pass, one-panel-at-a-time workflow right after your polish is buffed off and the surface is clean.
For boats that live outdoors year-round, get hard salt or freshwater exposure every week, or have a history of aggressive oxidation, Undrdog Marine Plus is the higher-durability marine coating designed for the harder use case. If you're not sure which fits your boat, the Undrdog Marine vs Marine Plus comparison guide walks through the differences.

Between-Polish Maintenance That Actually Preserves the Work
Polishing is a reset. Maintenance is what keeps the reset from being needed again next month.
Rinse After Every Outing
Salt water, freshwater mineral spray, and airborne pollutants all sit on the hull and start attacking the coating the moment the boat comes back to the trailer or lift. A fresh-water rinse after every trip removes the aggressive stuff before it bakes on.
Wash Weekly During the Season
A weekly proper wash with a pH-balanced marine soap removes what rinsing can't — the salt film, biological load, and mineral haze that dry and etch if left sitting. Two buckets, soft mitt, top-down, from bow to stern.
Use a Hydrophobic Topper Between Coatings
A quick maintenance spray after washes refreshes the beading and cleans off light contamination without abrading the coating. Undrdog Quick Detail works as a compatible maintenance topper over a Marine or Marine Plus ceramic base.
Address Water Spots Fast
Mineral spotting on a coated hull is much easier to remove in the first week than in the first month. A dedicated water spot remover handles it without touching your ceramic layer.
Store Covered When Possible
Even a great coating benefits from reduced UV contact. A breathable marine cover during long storage windows dramatically slows the next round of oxidation. Cheap plastic tarps trap heat and moisture and do more harm than good — get one that breathes.
Common Boat Polishing Mistakes (And How to Avoid Them)
Starting Too Aggressive
Reaching for a wool pad and heavy compound on a boat that only needed a finishing polish removes gel coat you didn't need to remove. Always start with the least aggressive product that gets results in your test spot. You can always go up. You cannot put gel coat back.
Skipping the Polish Step
Compounding alone leaves haze and wool marks. If you seal on top of that haze, you seal it in. Do the finishing polish step. Every time.
Working in Direct Sun
Hot gel coat flashes compound too fast to work properly and generates too much heat under the pad. Chase shade. If you can't, work smaller sections and move faster.
Reusing Loaded Pads
A pad packed with spent compound cuts less and hazes more. Spur wool pads every panel, swap foam pads when they feel loaded, and keep at least two of each type on hand.
Skipping Protection
Unprotected polished gel coat oxidizes faster than untouched gel coat — the correction opened the surface. Wax, seal, or coat immediately after polishing. Not next weekend.
Can You Use Car Polish on a Boat? What About Boat Polish on a Car?
You can, but you usually shouldn't. Marine gel coat is a harder, thicker surface than automotive clear coat, and marine compounds are formulated to cut through it efficiently. Automotive compounds are generally too fine to remove real gel coat chalking without burning through hours of pad time. Going the other way — using aggressive marine compound on car paint — is a fast route to a burned clear coat because auto paint is far thinner than gel coat and can't take that cut.
The finishing polishes and sealants at the end of the workflow have more crossover than the compounds do. A finishing polish designed for paint can often work fine as a final gloss step on gel coat. But for the actual oxidation removal step, use a product made for marine surfaces.
How Often Should You Polish a Boat?
The honest answer: as often as the gel coat's condition demands, not on a fixed schedule.
- Boats stored covered with a ceramic coating: Full polish every 2–4 years, sometimes longer.
- Sealed or waxed boats with regular use: Light polish annually, full compound-and-polish every 2 years.
- Uncovered boats in full sun with heavy use: Annual compound-and-polish is realistic.
- Neglected boats coming back from years of chalking: One heavy correction, then a durable protection layer, then the maintenance rhythm above.
The goal is to polish as rarely as possible. Every correction removes a little gel coat, and gel coat is finite. Great maintenance between polishes is what makes that possible.
Just polished your boat? Lock it in before UV starts over.
Undrdog Marine is the DIY-friendly marine ceramic coating built for freshly polished gel coat — one-pass application, protects against UV, salt, and mineral spotting far longer than wax or sealant.
Shop Undrdog Marine →Boat Polishing FAQ
What is the difference between compounding and polishing a boat?
Compounding uses a more abrasive product and a cutting pad to remove oxidized, damaged gel coat. Polishing uses a less abrasive product and a softer pad to remove the fine scratches and haze compounding leaves behind, restoring clarity and gloss. Heavy oxidation needs both; light oxidation may only need polishing.
Do I need a rotary polisher or can a dual-action polisher polish a boat?
A quality dual-action polisher handles most DIY boat polishing jobs on light to moderate oxidation. Rotary polishers cut faster and are the professional choice for heavy chalking, but they generate more heat and are easier to burn a panel with. If you've never used a rotary, start with a DA.
How long does it take to polish a boat?
A well-maintained 20-foot hull with light oxidation might take 4–6 hours for a single-step polish and sealant. A neglected, heavily chalked 25-foot hull needing compound, polish, and coating can easily take a full weekend. Break the work into hull sides, transom, and deck — plan on more time than you think.
Can I polish a boat by hand without a machine?
For small areas, spot correction, or a boat with only light haze, yes. For a full hull with actual oxidation, hand polishing is a slow and inconsistent way to get uneven results. A DA polisher is worth the investment if you plan to keep the boat.
How do I remove heavy oxidation from gel coat?
Wash and decontaminate, then compound with a wool cutting pad and a heavy-cut marine compound in a crosshatch pattern, one two-foot section at a time. Follow with a foam polishing pad and finishing polish. If compound can't cut through the damage, you're into wet-sanding territory (600 → 1000 → 1500 → 2000 grit) before compounding.
What is the best protection for a polished boat hull?
For maximum durability, a marine ceramic coating like Undrdog Marine or Marine Plus provides 12+ months of protection against UV, salt, and mineral spotting. Polymer sealants last 3–6 months. Marine wax lasts 4–8 weeks. Pick based on how the boat is stored and how often you're willing to reapply.
Can I use a marine ceramic coating over an old wax?
No. Ceramic coatings need to bond directly to clean, decontaminated gel coat. Any wax, sealant, or oil residue on the surface will keep the coating from bonding properly. Strip existing wax with a decon wash or IPA wipedown before applying a ceramic coating.
Does polishing a boat remove scratches?
Light scratches in the top of the gel coat, yes — compound and polish can remove them. Deep scratches that have penetrated below the gel coat surface layer need to be filled with gel coat repair paste and then leveled with wet sanding and polishing.
How do I know if my boat is too far gone to polish?
If the gel coat is pitted, has worn through to the fiberglass in patches, or the color has completely faded to grey with no depth even after test-spot compounding, you're looking at recoating with a two-part topcoat or new gel coat spray rather than polishing. A test spot with heavy-cut compound tells you fast — if you can't get a shine back after aggressive correction, restoration is beyond polishing.
What kind of polish is best for a fiberglass boat?
A marine-formulated compound and polish system designed for gel coat. Auto polishes are often too fine to remove real gel coat oxidation. Look for a heavy-cut marine compound for oxidation removal and a marine finishing polish for the gloss step.



Leave a comment
This site is protected by hCaptcha and the hCaptcha Privacy Policy and Terms of Service apply.