


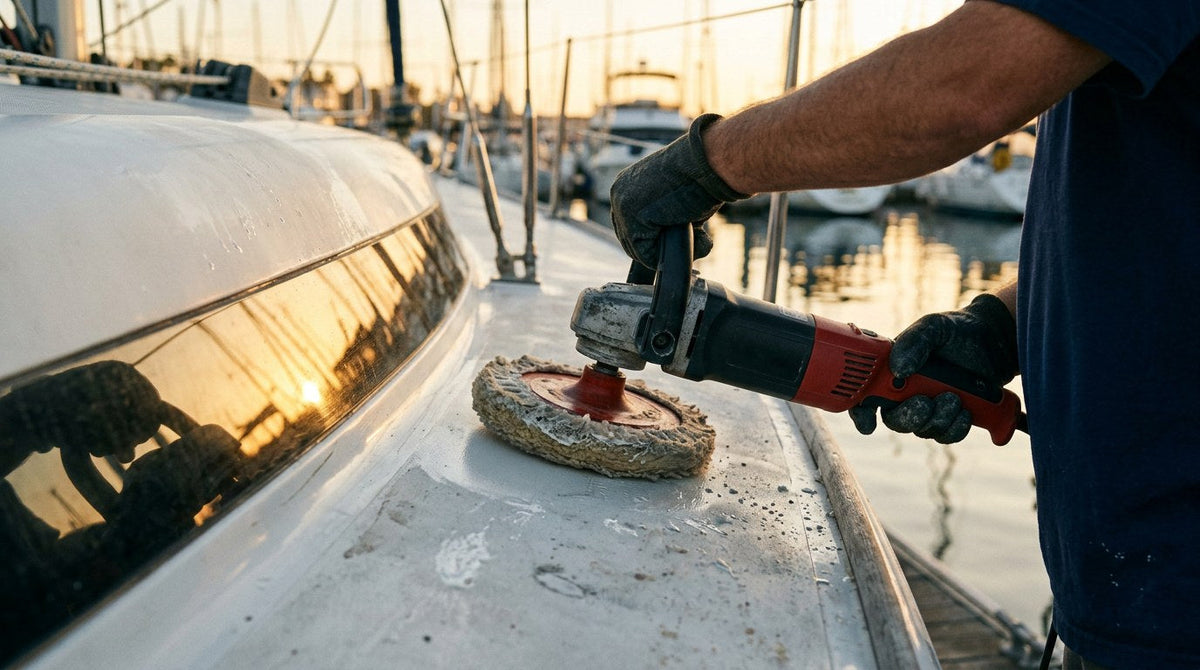
To use a buffer on a boat safely, prime a wool cutting pad with heavy-cut marine compound, work in 2×2-foot sections at 1,200–1,800 RPM with the pad held flat and lightly overlapping, then switch to a clean soft foam pad and finishing polish at around 2,000 RPM with a lighter touch until the section reads glossy in raking light. Keep the pad moving, keep the edge tilted off corners and trim, and wipe residue with a clean microfiber before inspecting.
Nothing in that paragraph is complicated. What separates a good result from a burned edge or a hologrammed hull is technique — the same tool, the same pad, and the same product will give you a mirror finish or a $2,000 gelcoat repair depending on how you hold it, how fast you move, and how much you overlap. This guide walks the entire process step by step, including the pad and speed choices that keep beginners out of trouble, the section-size and overlap pattern that produces even results, and the mistakes that quietly ruin gelcoat before you notice.
Rotary vs Dual-Action: Which Buffer Should You Use on a Boat?
Both work. They cut differently, they behave differently in your hands, and one is significantly more forgiving than the other. Pick based on the oxidation you're facing and your experience level, not on what someone at the marina told you.
A rotary buffer spins the pad in a single fixed direction. That direct rotation is what makes it aggressive enough to cut through stage 3 or stage 4 oxidation (heavy chalking, deep dullness) without wearing you out. It's the professional standard for compounding heavily oxidized fiberglass. The tradeoff is heat: rotary heads generate more of it than a DA, and heat is what burns gelcoat. On thin edges, sharp corners, and around hardware, a rotary in the wrong hands can strip color right off the boat.
A dual-action (DA) polisher — sometimes called a random orbital — oscillates the pad in a wobbling pattern instead of spinning it in a fixed circle. That motion breaks up heat and reduces the chance of burning gelcoat or leaving swirl patterns, which is why most first-time users are pointed toward a DA. The downside is cut speed: a DA takes noticeably longer to remove heavy oxidation, and on some stage-4 hulls it simply won't get through the chalky layer without wet sanding first.

Quick pick
- Light to moderate oxidation, first buffer, no urgency: DA polisher, variable speed, 5- or 6-inch backing plate.
- Heavy oxidation, stage 3–4 chalky hull: Rotary for the cut, DA (or rotary at lower speed with a soft pad) for the finish.
- Vertical hull sides and cabin tops with curves: Smaller pad (5-inch), any machine — big pads are harder to keep flat on curved surfaces.
If this is your first time buffing a boat and your hull is anywhere past stage 3, buy or borrow a DA before you commit to a rotary. The cut speed you gain from rotary is offset by the damage risk on a surface you don't know yet. For a full breakdown of the process and product picks, see the complete 2026 boat cut and polish guide.
Pads: What Actually Goes on the Machine
Pad choice does more of the work than compound choice. The compound provides the abrasive; the pad provides the pressure and the cutting texture. Get the pad wrong and even the best compound underperforms.
Wool cutting pads — twisted or knitted natural or synthetic wool — are the standard for the compounding step on oxidized gelcoat. Wool grabs compound aggressively, transfers heat away from the surface, and cuts faster than any foam pad. It also leaves more haze behind, which is why the polishing step exists.
Stiff foam cutting pads (usually orange or yellow) work with heavy-cut compound too. They're a step less aggressive than wool but easier to keep flat on curved sections. Fine for stage 2–3 oxidation; on stage 4 they'll take longer and load up faster.
Soft foam finishing pads (white, blue, or black depending on brand) are for the polishing step after compounding. Their job is to work fine polish into the surface, refine the haze left by the cutting pad, and produce the actual gloss. Use them only with fine polish — never with heavy compound.
Every pad needs to be clean before it touches the boat. A pad clogged with old compound loses its cut, drags residue across the surface, and generates uneven heat. Blow it out with compressed air between sections and rinse it thoroughly at the end of the day.
The Section-Size Rule That Fixes Most Beginner Results
Work a 2-foot by 2-foot section. Not a 4-foot stretch of hull, not "the whole waterline in one pass." A 2×2 section is small enough that the pad stays wet with product from start to finish, the RPM stays consistent, and you can see exactly what the compound is doing before you move on.
Both engineerfix and augustrace independently recommend this same section size, and every marine detailer running rotary equipment works to it. There's nothing magic about the number — it's just the largest area a 6- or 7-inch pad can properly work before the compound dries out and starts hazing the finish instead of cutting it.
The overlap pattern
Inside each section, run the buffer in overlapping passes. The standard is roughly 50% overlap on each pass — the pad moves horizontally across the section, then vertically over the same area on the return pass, so every square inch gets worked from two directions. Slow, controlled passes at moderate pressure. Fast passes miss the deeper oxidation; heavy pressure builds heat.

Speed and Pressure: The Two Numbers That Matter
Everything about RPM and pressure comes down to managing heat. Buffing works by micro-abrasion — the compound's particles wear a thin layer of gelcoat down until the oxidized surface is gone and fresh material is exposed. If you generate too much heat too fast, that same abrasion burns through instead of cutting through.
Cut (compounding) with rotary: Start at 1,200–1,800 RPM. Slower for edges and curves, mid-range for flat panels, only push into the upper end when a stubborn section isn't clearing. Pressure is moderate and consistent — enough weight that the pad flexes slightly against the surface, no more.
Polish with rotary or DA: Bump the machine to around 2,000 RPM. Drop the pressure to a light touch. The soft foam pad and fine polish work through diminishing abrasives — the abrasive particles physically break down as they're worked, progressively producing a finer finish. Heavy pressure short-circuits the process because it breaks the abrasives before they've done their job.
Cut with DA: DA polishers use their own speed scale (usually 1–6). Compounding sits at 5–6, polishing at 3–4. Because a DA oscillates instead of spinning at raw RPM, direct comparisons to rotary speed don't work — trust the machine's stage recommendations for the compound you're using.
Comparison: RPM, pad, and pressure by step
| Step | Machine | Pad | Speed | Pressure | What "done" looks like |
|---|---|---|---|---|---|
| Cut (compound) | Rotary preferred | Wool or stiff foam cutting | 1,200–1,800 RPM | Moderate | Chalky residue gone, early sheen appearing, no dull spots left in a raking-light check |
| Polish (refine) | Rotary or DA | Clean soft foam finishing | ~2,000 RPM | Light | Deep even gloss, no haze, no swirls visible under raking light |
| Seal (wax / coating) | Hand or DA | Applicator or finishing pad | Low / hand | Very light | Even film, cured per product spec, water beads on rinse |
Step-by-Step: How to Use a Buffer on a Boat
1. Prep the surface
Wash the boat thoroughly with a marine-safe soap and rinse. Anything left on the surface — salt, grime, iron fallout — will drag under the pad and scratch the gelcoat. For iron and rust specks that survive a normal wash, use The Purps as a pre-buff decontamination step; it turns iron contamination purple and rinses clean so the wool pad isn't grinding metal particles into the surface. Let the hull dry completely before you turn the machine on.
2. Assess oxidation level
Rub a clean microfiber across a section of the hull. If it comes back with a chalky white film, you have real oxidation and you're going to compound. If it comes back clean but the finish is dull, you may only need the polishing step. Under raking light — a work light held at a shallow angle to the surface — you'll see haze, scratches, and swirls that direct light hides.
3. Prime the pad
Apply compound directly to the pad, before the machine is turned on. Working the pad against a clean section of the hull briefly at low speed spreads the compound evenly. Priming does two things: it prevents the pad from slinging product across the boat when you spin it up, and it saturates the pad face so the first pass actually cuts instead of dry-buffing.
4. Cut in 2×2 sections
Machine on. Move the pad across the section in slow, overlapping horizontal passes, then again in slow overlapping vertical passes. Keep the pad flat — tilting it puts all the pressure on one edge, which is where burns happen. Watch the compound: it starts wet and creamy, works down as it cuts, and eventually goes clear or dusty as the abrasives break down. That's your signal to stop moving the machine over that section.
5. Wipe and inspect
Wipe the section clean with a fresh microfiber towel. Move the light around. If you still see chalky patches, dull spots, or streaks of oxidation, hit those areas again with the same pad and compound. If it's clean and glossy but hazed, move on to the polish step.
6. Polish
Swap to a clean soft foam finishing pad. Apply fine polish, prime the pad the same way, bump the speed up slightly, and drop the pressure. Same 2×2 sections, same overlapping pass pattern. The polish breaks down as it works — you'll see the product clarify from cloudy to nearly transparent as the abrasives finish. Stop moving when it clarifies.
7. Protect
Fresh polished gelcoat is naked and porous. UV, salt, and chalking will start returning within weeks if you don't seal it. A wax or polymer sealant will hold gloss for a couple months; a proper marine ceramic coating will hold it for a full season or more with basic care.

The Mistakes That Ruin Gelcoat (and How to Avoid Them)
- Working too fast a section. "Just doing the waterline" in one long stroke means the pad dries, the compound hazes, and half the section barely gets cut. Stay 2×2.
- Pressing hard. Heat, not pressure, is what removes gelcoat. Heavy pressure produces heat faster than it produces cut, and thin edges pay the price first.
- Tilting the pad. The pad has to stay flat against the surface. A tilted pad concentrates all the load and all the friction on one edge — that edge burns.
- Buffing over edges, corners, and hardware. Gelcoat is thinnest at every edge and corner. Rails, cleats, chine strakes, rub rails, and the sharp lines under a swim platform will strip to white primer or fiberglass first. Tape them off or work up to them by hand.
- Skipping the polish step. Compound alone leaves haze and light swirl. If you seal over hazed gelcoat, the haze is what you'll see through the coating for the next season.
- Loading a dirty pad. A pad still packed with yesterday's compound cannot cut cleanly. It will drag old residue back into today's finish. Clean or swap pads between sections.
- Full-throttle from the start. Turning the machine on at max RPM before the pad touches the surface flings compound everywhere and lurches the pad on contact. Spin up gently, on the surface, after priming.
- Buffing in direct sun on a hot day. Panel temps above roughly 110 °F flash-dry the compound before it can cut properly, and heat plus buffing heat is where thin gelcoat gives up.
How to Keep the Finish You Just Restored
Buffing gelcoat is subtractive — every session removes a thin layer, and gelcoat is only so thick to begin with. The goal is to buff once, protect well, and go a long time before you need to buff again. That means sealing the freshly polished surface with a durable protection layer so UV, salt, and airborne contamination hit the coating instead of the gelcoat.
Undrdog HCC is the flagship hybrid ceramic that works across cars, boats, planes, and bicycles — apply it right after the polish step and it bonds to the freshly opened gelcoat, producing hydrophobic beading and a UV-resistant barrier that extends the life of the buff work. For heavier marine use — bottom of the waterline, weekly saltwater exposure — Marine Plus is the dedicated marine option and holds up longer under sustained saltwater exposure. Either way, protecting after buffing is what stretches "polish twice a decade" instead of "polish every spring."
For related reading: the full boat polishing guide covers the full process from decon through ceramic, and the 2026 boat polish buyer's guide compares products by oxidation stage.
Don't buff a boat every spring — protect it once
Undrdog HCC bonds to freshly polished gelcoat and holds the gloss through UV, salt, and repeated washes. All-surface hybrid ceramic — one bottle covers your boat, your truck, and everything in between.
Shop HCC →Frequently Asked Questions
Should a beginner use a rotary or a DA polisher on a boat?
Start with a DA polisher unless the hull is heavily oxidized. The oscillating motion generates less heat and is much less likely to burn gelcoat on edges and corners. Once you understand pad control, speed, and pressure, a rotary will cut faster on heavy stage-3 or stage-4 oxidation.
What RPM should I use to buff my boat?
For compounding with a rotary and a wool or stiff foam cutting pad, work in the 1,200–1,800 RPM range. For polishing with a clean soft foam finishing pad, bump up to around 2,000 RPM with lighter pressure. Above about 2,200 RPM you're generating more heat than cut and the risk of burning gelcoat climbs sharply.
How much pressure should I put on the buffer?
Moderate for the compounding step — enough weight that the pad flexes slightly against the surface, no more. Light for polishing. Let the pad and product do the cutting; excess pressure just generates heat, which burns gelcoat and breaks down the abrasives before they've done their job.
How big of an area should I buff at a time?
A 2-foot by 2-foot section. That's the largest area a standard 6- or 7-inch pad can properly work before the compound dries out and starts hazing instead of cutting. Bigger sections produce uneven results and dry patches; smaller sections work fine but slow you down without a real benefit.
Can I use a car polisher on a boat?
Yes. The machine itself doesn't know what it's polishing — a quality DA or rotary designed for automotive paint will work fine on marine gelcoat. What you may need to change is the pad and the compound: gelcoat is generally softer than automotive clear coat and heavier oxidation demands more cut. Match the pad and compound to the surface, not the machine to the brand.
What causes gelcoat to burn while buffing?
Heat, produced by some combination of high RPM, heavy pressure, a tilted pad, or working over a thin edge. All of them stack. The fix is keeping the pad flat, using moderate pressure, staying at recommended speed, and never dwelling on edges, corners, or hardware where gelcoat is thinnest.
How often should I buff my boat?
As rarely as possible. Every buff session removes gelcoat. If you protect the hull with a quality wax or ceramic coating and wash regularly, a well-kept boat may only need compounding every 3–5 years. A neglected hull with heavy oxidation may need a full compound every 1–2 years — which is a strong argument for sealing after this buff.
Do I need to compound before I polish?
Only if the hull has real oxidation. On light haze, a single-stage polish with a soft foam pad may bring back the gloss without compounding at all. On chalky, stage-3 oxidation, compound first with a cutting pad, then polish with a finishing pad — skipping the compound leaves the chalky layer intact under the gloss.
Should I wet the pad before buffing?
Not for a marine gelcoat compound job. Prime the pad with compound instead — a light coat of product worked into the face of a clean, dry pad. Some polishers add a spritz of water or quick detailer during long sessions to keep the pad from drying, but that's a maintenance step during work, not a pre-buff soak.
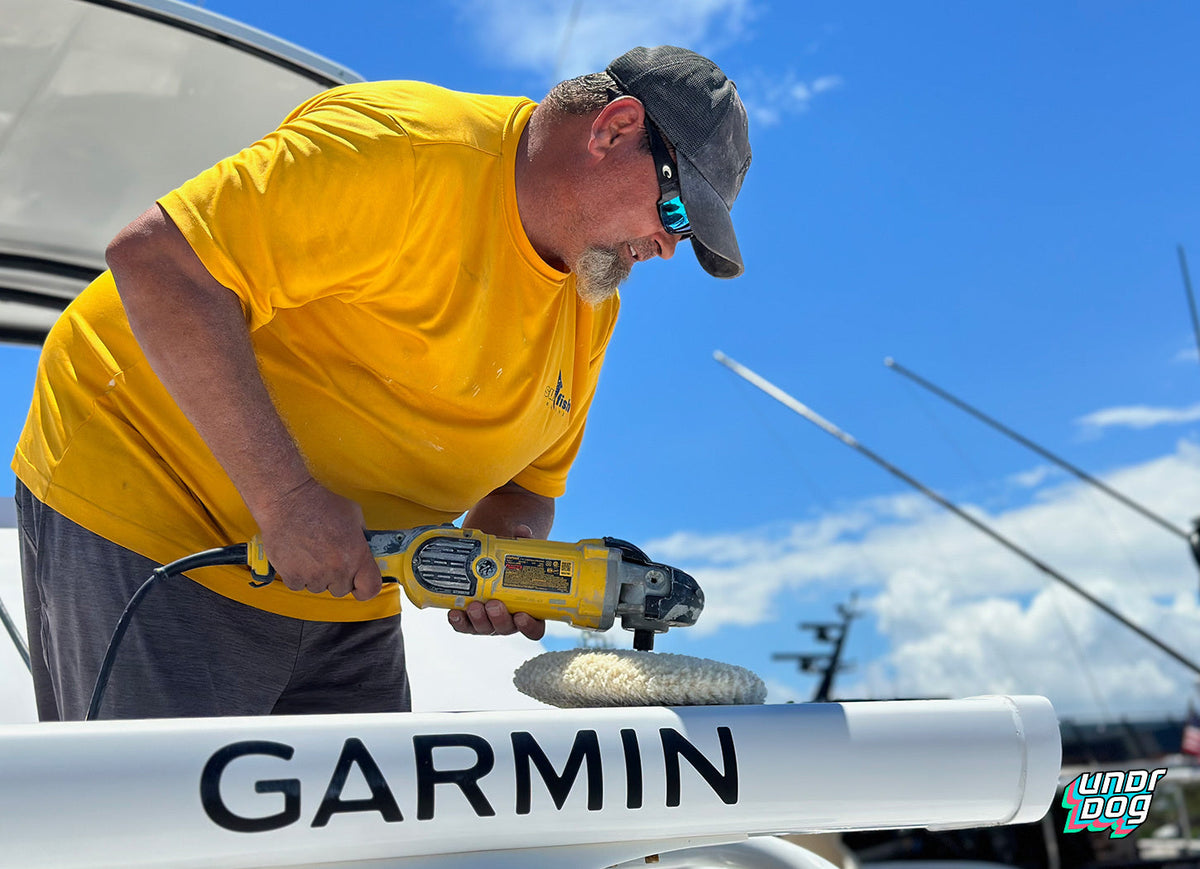

Leave a comment
This site is protected by hCaptcha and the hCaptcha Privacy Policy and Terms of Service apply.