


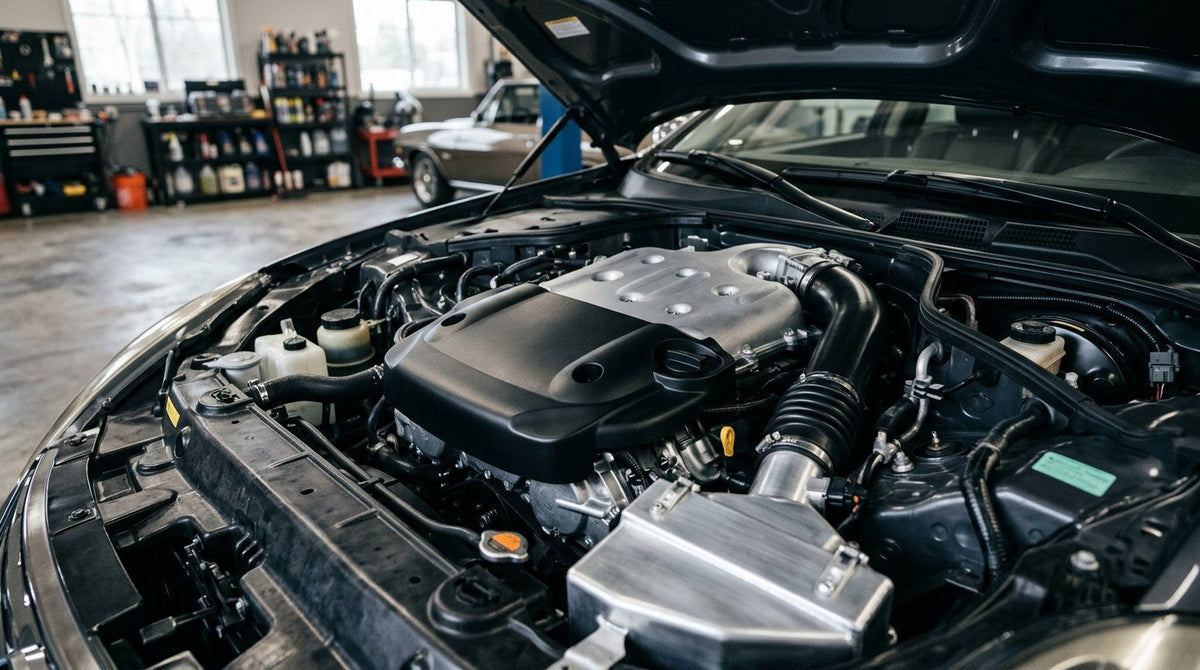
To detail an engine bay safely, let the engine cool completely, disconnect the battery, cover the alternator, air intake, fuse box, and any exposed connectors with plastic bags and tape, blow out loose debris, apply a water-based degreaser, agitate with soft brushes, rinse at low pressure from top down, dry with microfiber and compressed air, and dress the plastics and hoses with a non-silicone dressing. Never spray water at high pressure into a hot or covered engine bay — that's how you kill sensors, alternators, and electrical connectors.
This guide walks you through the full process the same way a professional detailer would approach it: what to cover, what products to use, how to agitate without breaking anything fragile, how to rinse without forcing water into wiring, how to dry so nothing corrodes, and how to dress the finish for a satin factory-fresh look that resists future grime.

Why Engine Bay Detailing Is Different From Washing the Rest of the Car
An engine bay is not a paint panel. It's a live electromechanical system with exposed wiring, sensors, air intake openings, and connectors that were engineered assuming they'd stay dry. Modern engines are more water-sealed than they were 20 years ago, but the assumption still holds: manufacturers test for splash and rain, not direct pressurized water blast from a garden hose or pressure washer.
The mistakes people make cleaning an engine bay — spraying it with a pressure washer, using harsh solvents, doing it hot, skipping component protection — usually don't cause instant failure. They cause slow damage: a moisture-shorted MAF sensor that throws a check engine light three weeks later, corroded terminals that make starting inconsistent all winter, a fried alternator diode, a fuse box that fills with residue and eventually crashes an accessory circuit. Detail the engine bay carefully once and it stays clean for a long time. Do it wrong and you're chasing electrical gremlins.
Before You Start: Safety and Prep Checklist
Every mistake in engine bay detailing traces back to one of these steps being skipped or rushed.
Let the Engine Cool Completely
Hot metal and cold water don't mix. Thermal shock can crack an exhaust manifold, warp a valve cover, or crack plastic components that have expanded under heat. Wait a minimum of 30–45 minutes after the last drive. In practice, cleaning first thing in the morning after the car sat overnight is ideal.
Test with the back of your hand hovering an inch above the exhaust manifold and valve cover. If you feel warmth, wait longer. The engine should feel completely ambient before any water touches it.
Park Somewhere Shaded and Ventilated
Direct sun flashes degreaser before it can work and dries water into streaks and mineral deposits. A shaded driveway with airflow is ideal. If you can only work in a garage, open the door for ventilation — degreaser fumes are unpleasant in an enclosed space.
Disconnect the Battery (Optional but Recommended)
Not strictly required for a light clean, but disconnecting the negative terminal first, then positive, prevents accidental shorts if water bridges an exposed connector. If your car has an anti-theft radio or a critical relearn procedure on power loss, skip this step and be extra careful with battery terminal coverage instead. According to AutoZone's engine bay cleaning guide, disconnecting the battery is a standard safety recommendation for a full detail.
Gather Your Tools Before You Start
- Water-based, non-caustic engine degreaser (never a caustic or high-pH cleaner)
- All-purpose cleaner (APC) diluted for lighter cleaning
- Multiple detailing brushes — a large soft-bristle for big panels, a medium for hoses, a small detail brush for tight spots
- 4–6 clean microfiber towels
- Plastic grocery bags or contractor cleanup bags
- Painter's tape or masking tape
- Garden hose with an adjustable nozzle (a low-pressure spray, never a jet)
- Compressed air, a leaf blower, or an automotive blow dryer for drying
- Non-silicone plastic and rubber dressing for finishing
- Nitrile gloves and safety glasses
Step 1: Cover the "Do Not Wet" Components
This is the single most important step. Water in the wrong places causes 90% of engine bay wash damage. The must-cover list is short but non-negotiable: the air intake, the alternator, exposed fuse and relay boxes, the battery terminals, and any open or aftermarket connectors.
Cover These Every Time
- Air intake / cold air intake: Water sucked into the intake can hydrolock the engine. Cover any exposed intake tube opening or filter box with a plastic bag and tape.
- Alternator: Wrap the alternator body in plastic and tape the edges so water can't reach the internal windings and brushes.
- Fuse and relay boxes: If the box lid isn't sealed shut, cover it. Water in a fuse box corrodes contacts and can short accessory circuits.
- Battery and terminals: Even with the battery still installed, wrap the terminals to prevent water bridging positive to negative.
- Exposed electrical connectors: Any open plug, aftermarket splice, or exposed sensor connection gets a small piece of tape or plastic.
- Distributor cap (older vehicles): On pre-1996 vehicles with distributors, cover the distributor cap — water inside will cause immediate misfires.
You Can Usually Skip Covering
- Modern sealed connectors that have weather-tight gaskets from the factory
- Coil-on-plug ignition coils on modern cars (they're sealed) — but keep water pressure low around them
- The engine block itself, valve covers, and painted or plastic engine covers
If you're unsure whether something is sealed, cover it. It takes 30 seconds and prevents an expensive mistake.

Step 2: Blow Out Loose Debris (Dry Cleaning First)
Before any water or chemical touches the engine bay, blow out loose leaves, dust, dried mud, and pine needles from the cowl area, spark plug wells, and crevices. A leaf blower, compressed air, or a shop vac on reverse works. This step matters because loose debris turns into mud once wet, and mud is much harder to remove than dry debris.
The cowl area (the recess at the base of the windshield where the wipers sit) is a common trap for leaves and pine needles that eventually clog drain channels and cause water intrusion into the HVAC system. Blow it out while the hood is up.
Step 3: Pre-Rinse With Low-Pressure Water
A gentle pre-rinse with a garden hose on a wide, low-pressure spray loosens surface dust and cools any lingering warmth in metal components. Keep the pressure low — a soft shower spray, not a jet. Rinse from top down: hood underside first, then top of the engine, then down the sides. Skip covered components. This pre-rinse is usually enough to remove 20–30% of the loose surface grime before you even reach for the degreaser.
Never use a pressure washer at close range or on a narrow tip. Some detailers use a pressure washer on the widest, softest setting held 3+ feet away — that's the maximum. Direct high-pressure water at close range forces water past seals into places it should never go.
Step 4: Apply Degreaser and Let It Dwell
A water-based, non-caustic engine degreaser is the right chemistry. According to professional detailer engine-bay protocols, caustic cleaners can permanently stain or "whiten" sensitive aluminum and plastic components — high-pH cleaners react with the alloys used in modern engine covers and intake manifolds and leave a chalky residue you can't polish out.
Spray degreaser generously across every visible surface: valve covers, intake manifold, hoses, plastic covers, suspension towers, firewall, hood underside. Focus extra product on visibly greasy areas near the valve cover, oil filler cap, and any hose junctions where seepage collects.
Dwell time depends on grime level:
- Light grime (regular maintenance): 15–30 seconds
- Moderate buildup: 1–2 minutes
- Heavy baked-on grease: Up to 3–5 minutes, re-misting if the surface starts to dry
Never let degreaser dry on the surface. If it starts to look powdery or matte, re-mist immediately. Dried degreaser leaves residue that's harder to remove than the grease you started with.
Step 5: Agitate With the Right Brushes
Chemical alone lifts loose surface grime. Agitation is what breaks the bond between baked-on grime and the surface. Use a variety of brushes matched to each area:
- Large soft-bristle brush: Big flat surfaces like the hood underside, valve covers, and intake plenum
- Medium detail brush: Hoses, wire looms, and the areas around covered components
- Small detail brush or toothbrush: Bolts, crevices, sensor bases, and tight spots
- Long-handled brush: Reaching down into the cowl, behind the engine, and low on the firewall
Work in the same top-down sequence as the pre-rinse. Be gentle around wire looms, exposed connectors, and any thin plastic. The goal is to lift emulsified grease into a slurry, not to scrub the paint off a plastic cover.

Step 6: Rinse Thoroughly at Low Pressure
Rinse from the back of the engine bay toward the front so rinsed contamination flows out through the front (or wherever your drain paths lead). Keep the water pressure low. Skip covered components. Take your time — insufficient rinsing leaves degreaser residue that dries into chalky streaks and can degrade plastic and rubber over time.
Chemical Guys' engine bay guide recommends rinsing until you see no more suds or foam runoff — that's your signal that all the emulsified grime and cleaner is gone. If suds keep appearing, keep rinsing.
Step 7: Dry Everything Completely
Leaving the engine bay wet is the number-one cause of post-wash electrical issues. Water in a connector or on an exposed coil that seemed fine when wet becomes a corrosion pit two weeks later.
Drying Sequence
- Wipe accessible flat surfaces with clean microfiber towels — hood underside, valve covers, hoses you can reach
- Use compressed air, an automotive blow dryer, or a leaf blower to blow water out of connector gaps, hose clamps, spark plug wells, and behind components you can't reach with a towel
- Start the engine and let it idle for 10–15 minutes with the hood open — engine heat evaporates any water in inaccessible spots
- Leave the hood up in a warm, ventilated area for another 30+ minutes if possible
Removing all your covers before drying is fine — but do a final tape/plastic check before you drive off to make sure nothing was left behind (a plastic bag on an exhaust manifold melts fast and stinks up the cabin).
Step 8: Dress the Plastics and Hoses
A clean engine bay looks factory-fresh. A clean and dressed engine bay looks like a magazine cover. Dressing the black plastics, rubber hoses, and wiring booties restores the deep satin finish that heat and UV fade over time — and creates a hydrophobic layer that resists future dust and grime.
Use a Non-Silicone Dressing
Silicone-based dressings look great initially but "sling" when the engine gets hot, throwing droplets onto everything nearby. They also attract dust once dry, which defeats the whole point of protecting the surface. Look for a water-based, non-silicone dressing specifically formulated for engine bay use — a satin finish, not high-gloss shine.
Application Technique
Apply dressing to a foam applicator or microfiber applicator pad, then wipe onto the plastics and rubber. Never spray dressing directly onto engine components — overspray gets onto exhaust manifolds and burns off with a sharp chemical smell (and can be a fire hazard on very hot components).
Wipe off any excess with a clean microfiber. The look you want is satin factory-new, not glossy wet.
Engine Bay Detailing Do's and Don'ts
| Do | Don't |
|---|---|
| Let engine cool 30–45 min minimum | Spray water on a hot engine (thermal shock) |
| Cover alternator, intake, fuse box, connectors | Rely on "sealed" connectors without covering |
| Use water-based, non-caustic degreaser | Use caustic or high-pH cleaners (stains aluminum) |
| Rinse at low pressure, top-down | Pressure wash directly at close range |
| Dry completely with compressed air or blower | Close hood and drive off with water still in connectors |
| Use a non-silicone satin dressing | Spray silicone dressing directly on hot components |
| Idle 10–15 min after with hood up | Ignore lingering moisture in the fuse box |
What About Ceramic Coating an Engine Bay?
Once the engine bay is fully clean and dry, you can extend the results by coating painted metal surfaces, valve covers, and even engine bay plastics with a ceramic coating. It won't stop grime the way it does on paint, but it will make the next cleaning dramatically easier — grime rinses off, water beads and slides, and the deep satin look holds much longer than a traditional dressing. If you're new to prep, our ceramic coating basics guide covers what the coating actually does at the chemistry level.
HCC (Hybrid Ceramic Coating) is Undrdog's flagship all-surface hybrid ceramic — it works on cars, boats, planes, bicycles, and yes, engine bay painted metal and plastic surfaces once they're properly cleaned and decontaminated. Apply thin, level with a microfiber, and cure per the product instructions (see our ceramic coating cure time guide for full cure timelines).
For heavy-duty long-term protection on painted engine bay metal, Undrdog Pro and Pro Plus extend the durability window at the cost of stricter application conditions — usually a professional-only application. Once the coating is fully cured, our ceramic coating maintenance guide covers the wash and care routine that keeps it performing at its best.
How Often Should You Detail Your Engine Bay?
For a daily driver in a mild climate: once a year is plenty. Modern engines in reasonable environments don't accumulate the kind of grease and grime older vehicles did.
For older vehicles with visible oil seepage, coastal salt exposure, dusty environments, or off-road use: every 6 months keeps things manageable.
For show cars or vehicles you want to keep concours-clean: after every drive is overkill, but a quick wipe-down of visible surfaces once a month plus a full detail every 3–4 months keeps things in top shape.
Between full details, a fast maintenance approach: wipe down the underside of the hood and the visible top of the engine with an all-purpose cleaner and microfiber every time you wash the car. Skip the full degrease-and-rinse process unless the engine bay is visibly dirty. That maintenance rhythm — combined with a proper full detail once or twice a year — keeps things clean without over-washing.
Common Engine Bay Detailing Mistakes
Cleaning Hot
The most common mistake and the most damaging. Thermal shock from cold water on hot metal cracks manifolds, warps covers, and can shatter thin plastic. Always wait for the engine to cool fully.
Using a Pressure Washer at Close Range
Even "detailer-safe" pressure washers can force water past seals when held too close. Keep any pressure washing at 3+ feet on the widest, softest tip — or skip it entirely and use a garden hose.
Using Kitchen Degreasers or Purple Cleaners
Household degreasers and traditional "purple" heavy-duty cleaners are often caustic (high pH). They eat aluminum, dull plastics, and leave chalky residue. Use a water-based automotive-specific engine degreaser instead.
Skipping the Drying Step
Water in a connector or fuse box that seemed fine when wet corrodes over weeks and eventually causes weird electrical issues that are almost impossible to trace back to the wash. Drying is not optional.
Spraying Dressing on Hot or Belted Components
Silicone dressing on a hot exhaust manifold smokes and stinks. Dressing on a serpentine belt causes squealing and slippage. Always apply dressing to an applicator first, then wipe onto the surface — never spray directly.
Overdressing
Too much dressing looks wet and slick, attracts dust immediately, and slings when the engine gets hot. A thin satin coat wiped down with a clean microfiber is the finish you want.
Keep the whole car detailed to the same standard.
HCC is Undrdog's flagship hybrid ceramic — one-pass DIY application on paint, wheels, glass, engine bay metal, and any other exterior surface. Clean once, coat once, spend less time washing.
Shop HCC →Engine Bay Detailing FAQ
Is it safe to wash your engine bay with water?
Yes, if you do it correctly. Let the engine cool fully, cover the alternator, air intake, fuse box, and exposed connectors with plastic and tape, use low-pressure water only (garden hose, never a close-range pressure washer), and dry everything completely afterward. Water is only dangerous when it reaches components that weren't designed to get wet.
Can I pressure wash an engine bay?
Not at close range. If you use a pressure washer, keep it on the widest, softest tip and stay at least 3 feet from any component. Direct high-pressure water forces moisture past seals and into places it should never go — alternators, fuse boxes, and exposed connectors are especially vulnerable. A garden hose on low pressure is safer and works just as well.
What degreaser should I use for engine bay cleaning?
A water-based, non-caustic automotive engine degreaser. Avoid caustic (high-pH) cleaners — they permanently stain aluminum and dull plastics. Avoid harsh solvents that damage rubber hoses and wire loom sheathing. Stick to products labeled specifically for engine bay use.
How long does it take to detail an engine bay?
Plan on 45–90 minutes for a full detail on a moderately dirty engine bay: 15 minutes prep and covering, 20–30 minutes degrease and agitation, 10 minutes rinse, 15–20 minutes drying, 10 minutes dressing. Heavy buildup or first-time restoration jobs can take 2–3 hours.
Do I need to disconnect the battery to clean my engine bay?
Not strictly required for a light clean if you cover the terminals carefully. Disconnecting is recommended for a full detail because it eliminates any risk of accidental shorts if water bridges an exposed connector. If your car has an anti-theft radio or requires a relearn on power loss, skip disconnection and be extra careful with terminal coverage.
How do I dry an engine bay after washing?
Wipe accessible surfaces with clean microfiber towels, then use compressed air, a leaf blower, or an automotive blow dryer to blow water out of connector gaps, hose clamps, and areas you can't reach with a towel. Start the engine and let it idle 10–15 minutes with the hood open so engine heat evaporates any remaining moisture. Leave the hood up in a warm ventilated area for at least 30 more minutes.
Can I use silicone dressing on engine bay plastics?
You can, but non-silicone dressing is better. Silicone-based dressings sling when the engine gets hot, throwing droplets onto surrounding components, and they attract dust once they dry. A water-based, non-silicone satin dressing gives a factory-fresh look that lasts longer and stays put.
How often should I detail my engine bay?
Once a year for a daily driver in a mild climate. Every 6 months for older vehicles with oil seepage, coastal salt exposure, dusty environments, or off-road use. Show cars benefit from a quick maintenance wipe-down monthly plus a full detail every 3–4 months.
Will detailing the engine bay affect my warranty?
Not if done correctly. Careful cleaning with appropriate products and low-pressure water shouldn't cause any damage that would affect warranty coverage. If cleaning causes damage — a shorted sensor from water intrusion, for example — that damage would not be covered under most warranties because it's user-caused. Follow the safety steps in this guide and warranty risk is minimal.
Can I ceramic coat an engine bay?
Yes. Once the engine bay is fully cleaned, dried, and decontaminated, you can apply a hybrid ceramic coating to painted metal surfaces, valve covers, and some plastics. It won't stop grime accumulation, but it makes future cleaning dramatically easier — grime rinses off, water beads and slides, and the satin finish holds much longer than a traditional dressing.


Leave a comment
This site is protected by hCaptcha and the hCaptcha Privacy Policy and Terms of Service apply.