


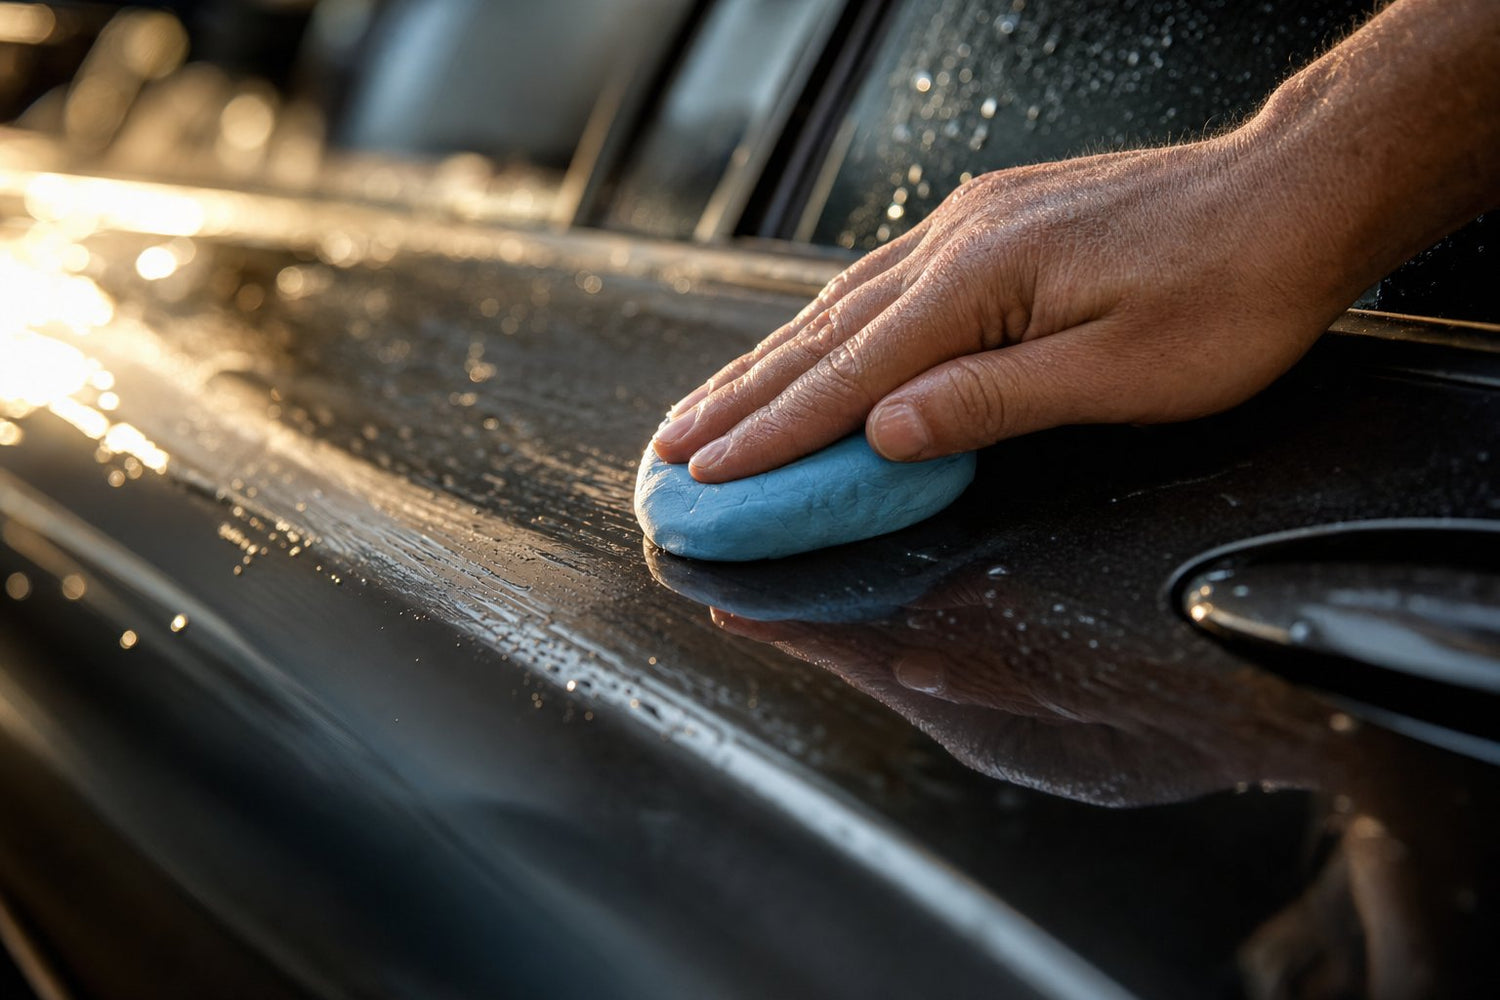
Claying a car means dragging a soft, pliable resin bar across lubricated paint to lift bonded contamination — brake dust, industrial fallout, tree sap, overspray, hard-water mineral — that a wash and a chemical decon can't fully remove. Done right, it takes 30–60 minutes and leaves the paint feeling like glass; done wrong, it grinds embedded grit across your clear coat and adds the exact swirl marks you were trying to avoid. This guide walks you through the exact technique, the right lubrication, when clay comes before or after iron remover, and how to protect the paint you just decontaminated.

What a Clay Bar Actually Removes
Washing removes surface dirt. Iron remover dissolves ferrous brake dust and industrial fallout at the chemical level. Clay handles the middle layer — the non-ferrous, mechanically bonded particles that neither water nor a chemical decon will lift. According to detailing professionals on Autogeek, that category includes overspray, road tar, tree sap, hardened bug remains, pollen glued down by rain, and mineral deposits from hard water. When you drag clay across paint that feels smooth to the eye but rough to a fingertip, the resin plucks those contaminants out mechanically and encapsulates them inside the bar.
The result is a genuinely smooth surface — the necessary starting condition for any polish, wax, sealant, or ceramic coating to bond properly. Skip claying and any protection you apply is sitting on top of dirt, not on top of paint.
The Plastic Bag Test: Do You Actually Need to Clay?
Before you commit an hour to claying, verify the paint actually needs it. Wash the car normally, dry a panel, then slide your hand inside a clean plastic sandwich bag or a clean latex glove and glide your fingertips across the paint with light pressure. According to Brilliatech's decon guide, if the paint feels rough, bumpy, or gritty through the bag, you have bonded contamination and claying is warranted. If it feels perfectly slick, hold off — claying an already-smooth panel adds friction and wear without any benefit.

Do the test on the hood, roof, upper doors, and trunk — the panels with the most horizontal exposure catch the most contamination and are where claying pays off first. Vertical panels usually stay smoother longer.
How often should you clay bar?
General guidance from most detailing sources: every 3–6 months for a daily driver in normal conditions, every 2–3 months in industrial areas or heavy commuter traffic, every 6–12 months for a garage-kept weekend car. On a ceramic-coated car, once a year is usually enough, and you should reach for a fine-grade clay or a clay towel rather than an aggressive bar.
Chemical Decon or Clay First? The Correct Order
This is where a lot of enthusiast tutorials get sloppy. The answer, according to nearly every pro detailer including the consensus on r/AutoDetailing, is chemical decon before clay:
- Wash. Two-bucket wash with a pH-neutral car soap to remove surface dirt.
- Iron / fallout remover. Spray, watch it bleed purple/red on ferrous particles, agitate lightly on wheels, rinse thoroughly. This handles the ferrous 60–70% of bonded contamination chemically, without any mechanical friction.
- Clay. Now clay handles the remaining non-ferrous contamination — the tar spots, sap, overspray, mineral — with dramatically less resistance because iron particles are already gone. Less friction means less risk of adding marring.
- Final rinse and dry.
- Polish (if needed) and coat.
Running iron remover first cuts your claying time in roughly half and cuts the marring risk with it. For the full step-by-step chemistry of a proper decon, see our guide on the correct paint decon order before coating.
What You Need Before You Start
Skimping on any single item on this list is how paint gets marred. Get all of it staged before you touch the car:
- A wash and rinse setup. Two-bucket wash with grit guards, pH-neutral soap, dedicated wash mitts.
- Iron / fallout remover. The Purps works fine as your ferrous decon step before claying.
- Clay bar or clay medium. A fine-grade clay bar (usually blue or white in most product lines) for coated or well-maintained paint. A medium-grade bar (usually yellow or grey) for neglected paint with heavy bonded contamination. Skip aggressive/heavy grades unless you know you're going to polish afterward.
- Clay lubricant. A dedicated clay lube or a quick detailer used at higher mist volume. You can also use diluted rinseless wash or, in a pinch, plenty of soapy water while the car is still wet from washing.
- 4–6 plush microfiber towels. 400+ GSM, freshly laundered, no fabric softener.
- A shaded, indoor or partially shaded workspace. Direct sun and hot paint make claying much harder and increase streaking risk.
- Something to protect the paint afterward. Claying strips any existing wax or sealant. If you don't reprotect, unprotected paint immediately starts collecting new contamination.
Step-by-Step: How to Clay a Car Without Marring the Paint
Step 1 — Wash and iron-decon the car.
Complete a two-bucket wash with pH-neutral soap. Apply iron remover, dwell 3–5 minutes without letting it dry, rinse thoroughly. Do this in the shade or in a garage — hot paint flashes off any product before it can work.
Step 2 — Tear off a fresh piece of clay and warm it in your hands.
Break off roughly a golf-ball-sized piece, knead it soft and pliable, flatten it into a disc about the size of your palm. Keep the rest of the bar sealed and unused. If you drop your working piece on the ground, throw it away — pick up ambient grit and you'll rake it across your paint. This is non-negotiable.
Step 3 — Mist the panel with lube until it's visibly wet.
The single most common claying mistake is under-lubricating. According to Chemical Guys' decon guide, the panel should look genuinely wet, not just misted — the clay needs enough lube to glide, not drag. If in doubt, mist more.
Step 4 — Glide the clay in straight lines with light pressure.
Set the clay flat on the lubricated panel. Move it in overlapping straight lines — front-to-back or side-to-side, never circles — with fingertip pressure only. You'll feel resistance at first as the bar grabs contamination; within a few passes over a section, that resistance disappears and the clay glides freely. That's your signal the panel is clean.
Step 5 — Fold the clay to expose a fresh face after every panel section.
Every couple of feet of work, fold the clay onto itself so the contaminated face is hidden and a clean face is exposed. Don't rub the exposed side against the paint until it's been folded in. This is what keeps you from re-depositing what you just lifted.

Step 6 — Wipe residue with a clean microfiber, panel by panel.
Once a section glides freely, wipe off the lube and any loosened residue with a folded plush microfiber. Flip and buff dry. Move to the next section.
Step 7 — Stop and replace the clay if it drops.
If your clay falls on the ground, driveway, mat, dashboard, tire — anywhere except onto the panel you're currently working on — it is done. Toss it. Reload with fresh clay. Any single piece of embedded grit will draw a line into your clear coat that a polish can barely remove.
Step 8 — Work the entire car top-down.
Roof → hood → trunk → upper doors → lower doors → bumpers. Save vertical panels and lower rockers for last since they'll be the most contaminated and will consume your clay fastest. Total time on a mid-size sedan is usually 45–75 minutes if the car is normally maintained.
Step 9 — Rinse and dry the car again.
Once the whole car is clayed, rinse the entire vehicle to flush any leftover lube and residue, then dry with a clean plush drying towel.
Step 10 — Reprotect immediately.
Clayed paint is naked. Apply a wax, sealant, or ceramic coating within a few hours before ambient contamination rebonds. For most people, this is the ideal moment to apply a coating — the surface is at its cleanest and most ready.
Clay Bar vs Clay Mitt vs Clay Towel
Traditional clay bars aren't the only option anymore. Here's how the three main clay mediums compare:
| Medium | How It Works | Speed | Marring Risk | Best For | Reusable After Drop? |
|---|---|---|---|---|---|
| Clay Bar | Kneaded resin picks up and encapsulates contamination inside the bar | Slowest (45–75 min for a car) | Low if lube is generous and technique is right | Neglected paint, heavier contamination, first-time decon | No — throw it away |
| Clay Mitt | Rubberized/synthetic clay film on a mitt, wipes contamination off | Fast (20–35 min for a car) | Higher — the flat mitt spreads any picked-up grit across a larger area | Maintained paint, routine decon, ceramic-coated cars | Yes — rinse and reuse for many jobs |
| Clay Towel | Microfiber towel with a clay-infused surface, gentler action | Medium (30–45 min) | Low on maintained paint, higher on heavily contaminated paint | Ceramic-coated cars, light bonded contamination | Yes — rinse and reuse |
Practical rule: clay bar for a first-time or heavy decon, clay mitt or clay towel for routine maintenance decon on already-clean paint. On a coated car, always prefer the mitt or towel — an aggressive clay bar can weaken the coating over time.
Common Claying Mistakes
These are the specific missteps that turn a helpful process into paint damage:
- Not enough lube. The number-one cause of clay marring. When in doubt, mist more.
- Working in direct sun on hot paint. Lube flashes off before the clay can glide. Move the car into shade.
- Wiping in circles. Straight overlapping lines only — same rule as any wipe on paint.
- Not folding the clay. Contaminated clay face against paint = mini rock tumbler.
- Reusing a dropped clay. The one single mistake that guarantees swirl marks. Throw it away.
- Skipping iron decon. Claying without an iron remover first doubles your work and doubles your marring risk.
- Not reprotecting. Naked paint left overnight starts rebonding contamination the next morning. Apply protection the same day.
- Claying a coated car with an aggressive bar. Use a mitt, towel, or fine-grade clay only. An aggressive bar will strip the coating.
After Claying: What to Apply Next
The reason claying matters is what comes after it. A properly clayed panel is the cleanest paint will ever be short of a polish, and it's the ideal bonding surface for protection.
Coating a clayed car
If the paint is clayed, polished (if needed), and IPA-wiped, you're in the perfect state to apply a ceramic coating. Undrdog HCC — our flagship hybrid ceramic that works on cars, boats, planes, and even bicycle frames — bonds directly to clean paint and delivers durable gloss and hydrophobicity. For a deeper walkthrough of the actual coating step, see how to apply a DIY ceramic coating without streaks or high spots.
If you're not coating
Apply a spray sealant or a paste wax within a few hours of finishing your claying. On coated cars, hit the freshly clayed surface with a hydrophobic quick detailer or ceramic topper to refresh beading — the coating itself is still intact if you used a mitt or towel.
Boat and marine paint
Fiberglass gelcoat and marine paint benefit from clay just like automotive clear coat. Clay it with the same technique, then reprotect with Undrdog Marine for a proper marine ceramic layer. HCC also works on marine paint if you want a single-product solution across your fleet.
Frequently Asked Questions About Clay Bars
Does claying a car damage the paint?
Not if you use enough lubrication, keep the clay clean, and fold it as it picks up contamination. Claying with insufficient lube or reusing dropped clay causes fine marring that shows up under sunlight as haze. With correct technique, claying is safe for factory clear coats.
Can I clay a ceramic-coated car?
Yes, carefully. Use a fine-grade clay bar, a clay mitt, or a clay towel — not an aggressive medium- or heavy-grade bar. Even then, only clay a coated car when the plastic-bag test confirms bonded contamination is actually present. Excessive claying will thin or strip the coating.
Do I clay or use iron remover first?
Iron remover first, then clay. Chemical decon handles ferrous particles without friction. Claying afterward has less work to do and much lower marring risk.
How long does one clay bar last?
A standard 100g bar handles roughly two to four cars if you keep it clean and fold it properly between passes. Bars used on a single heavily-contaminated car can be consumed in one job.
Can I use water instead of clay lube?
Only if the car is still wet from washing and soapy. Once the surface is dry, plain water doesn't have enough lubrication and marring risk rises quickly. Use a dedicated clay lube or a quick detailer misted heavily.
Do I need to polish after claying?
Not always. If the plastic-bag test is smooth after claying and there are no visible swirls, you can go straight to coating or sealing. If there are pre-existing swirl marks or you did notice light marring during claying, a single-step polish before coating will restore full gloss.
How often should I clay a daily driver?
Every 3–6 months in normal conditions. Every 2–3 months if you park outdoors in an industrial area, near a highway, or under trees. Every 6–12 months for a garage-kept weekend car. Let the plastic-bag test decide.
What if the clay leaves streaks or residue?
That's under-lubrication. Mist more lube, wipe with a clean microfiber, and repeat. Streaks on the paint after claying rinse off with a hose or a quick detailer wipe-down — they don't stain the clear coat.
Can I clay glass and headlights?
Yes. Clay lifts hard water spots and light bonded contamination from windshields and headlights. Use plenty of lube and a light touch. Wipers may skip on freshly clayed glass until the polymers settle — this is normal.
Is clay bar safe on matte or satin paint?
Only with a fine-grade clay and very light pressure. Matte paint scratches more easily than gloss and does not hide marring under reflection. When in doubt, use a clay mitt or a clay towel rather than a traditional bar.

Leave a comment
This site is protected by hCaptcha and the hCaptcha Privacy Policy and Terms of Service apply.