


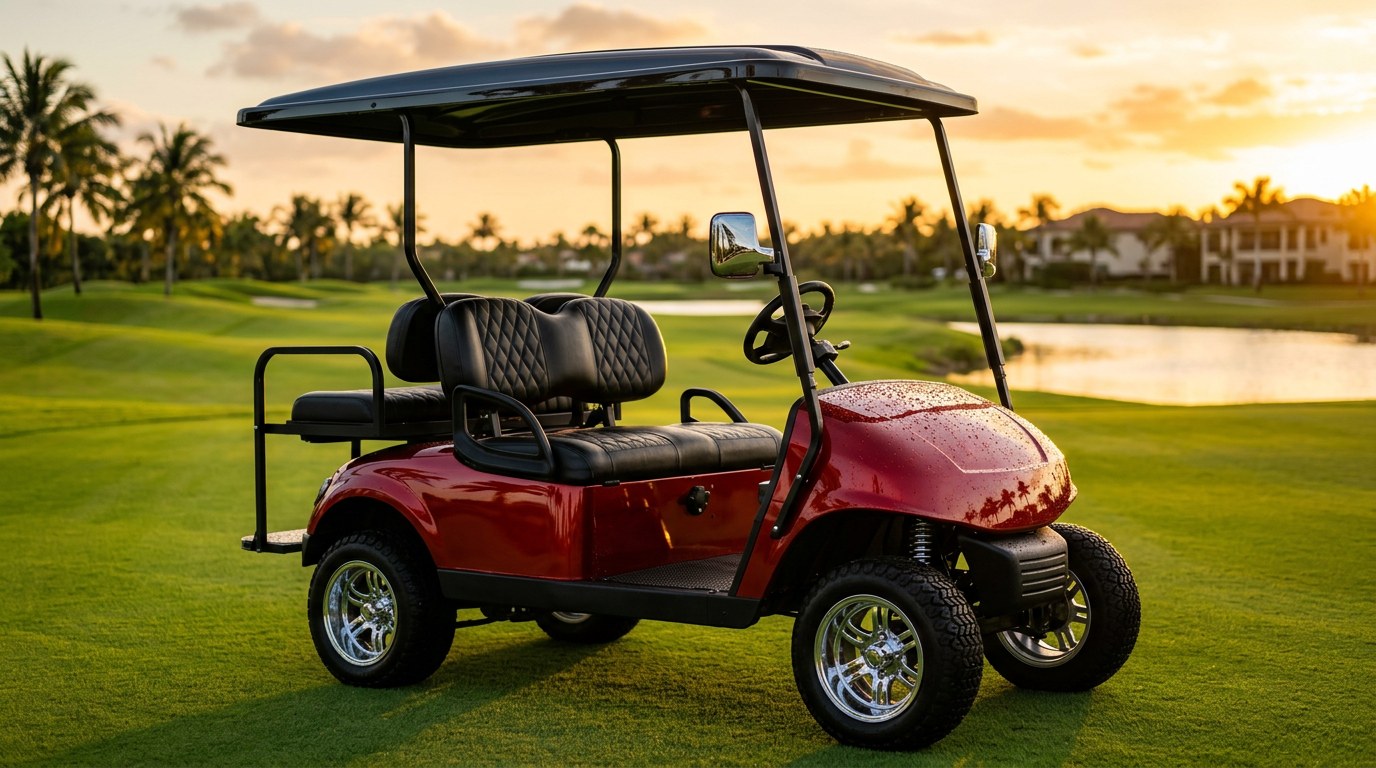
A golf cart lives outside almost every day of its life, exposed to more UV, salt, dew, sunscreen, and dirty balls than most cars will see in a decade. Ceramic coating is the difference between a cart that holds its color and gloss for 5+ years and one that turns chalky, dull, and faded in two. Here's exactly what to coat, what not to coat, how to prep painted, gel-coated, and plastic panels, and why HCC is the right choice for cart bodies, wheels, plastic trim, glass, and vinyl seats all in one bottle.

Why Golf Carts Fade Faster Than Cars
A daily-driver car spends most of its life in a garage, under carports, or in shade. A golf cart doesn't. It sits on cart paths, in driveways, at community docks, under palm trees, and near saltwater — day after day, year after year, with zero shade and no chance to cool down between exposures.
Combine that lifestyle with what most carts are made of and you get a UV problem three times worse than cars:
- Painted fiberglass or ABS body panels — thin factory clear coat with less UV inhibitor than automotive paint
- Molded plastic trim, dashes, and seats — no clear coat at all, just pigmented polymer that chalks quickly
- Aluminum wheels and stainless trim — vulnerable to salt pitting and oxidation in coastal use
- Vinyl and simulated-leather seats — dry out and crack from repeated 130°F+ surface temps
- Windshields — polycarbonate that yellows from UV, same failure mode as headlight lenses
All of that adds up to a cart that can look 10 years old at 3 years, or 3 years old at 10 — depending entirely on what protection you put on it and when.

What Ceramic Coating Actually Does for a Golf Cart
Ceramic coating creates a hard, semi-permanent SiO2-based protective layer that chemically bonds to painted surfaces, wheels, glass, and trim ([Detail 360](https://www.detail360stl.com/golf-cart-ceramic-coating-benefits)). On a cart specifically, that delivers:
- UV protection that dramatically slows fading and clear-coat failure
- Hydrophobic beading so rain, sprinkler water, and morning dew shed off instead of leaving mineral spots
- Chemical resistance against sunscreen, insect repellent, chlorine spray, and course chemicals
- Easier cleaning — dust and grass clippings wipe off with a rinse instead of adhering
- Gloss retention that keeps the paint looking freshly waxed for a year-plus with no maintenance
- Resale value — a well-preserved cart holds thousands more than a chalky one at trade-in
What to Coat on Your Cart (and What to Skip)
Coat
- Painted body panels — front cowl, rear body, fenders, roof (if painted)
- Fiberglass or gel-coat panels — some higher-end carts use marine-style gelcoat
- Aluminum wheels — after wheel-safe iron decontamination
- Windshield — polycarbonate lenses benefit hugely from UV-blocking topcoat
- Chrome accents and stainless trim — locks out salt pitting
- Painted rear seat kits and roll cages
Skip or Use Different Products
- Vinyl seats — use a dedicated vinyl protectant, not a hard ceramic (ceramic can make seats slippery and shiny in a bad way)
- Rubber floor mats — ceramic doesn't bond well; use a rubber conditioner
- Soft canvas or vinyl enclosures — dedicated fabric or vinyl protectants only
- Battery terminals or electrical contacts — obvious, but worth stating
- Textured non-slip step surfaces — makes them dangerously slick
The Prep — Where Most DIY Coatings Fail
Ceramic won't stick to dirty, waxed, or oxidized paint. Half the DIY jobs that "didn't last" failed at prep, not application.
Step 1: Two-Bucket Wash
Wash the entire cart with a pH-neutral car soap like Undrdog Soap. Use two buckets (one wash, one rinse) so grit stays out of your mitt. Rinse thoroughly. Full technique in our pH-neutral wash guide.
Step 2: Iron Decontamination
Spray an iron fallout remover like The Purps over the whole cart. Watch it turn purple as it dissolves embedded metallic contamination from cart-path dust, brake dust, and rail contact. Rinse thoroughly. This is essential on aluminum wheels especially.
Step 3: Clay Bar the Painted Panels
Detailing clay removes bonded contaminants your wash can't touch — pollen, tree sap, road film. Lubricate with a soap-water mist and glide the clay in straight lines with light pressure. Panels should feel glass-smooth after.
Step 4: Fix What Needs Fixing
If your cart already shows light oxidation or swirl marks, do a paint correction pass with a medium-cut compound and finishing polish. Ceramic locks in whatever's underneath — including flaws — so you want a clean canvas. Our DIY paint correction guide walks through the technique for compound-and-polish work.
Step 5: IPA Panel Wipe
Wipe every surface you plan to coat with 70% isopropyl alcohol on a plush microfiber. This strips any polishing oils, wax residue, or fingerprints that would block coating bond. Skip this step and the ceramic fails in weeks.
Applying Ceramic to a Golf Cart

Environment
Work in shade, out of direct sun, at 50–85°F. Low humidity is better. A garage is ideal. Direct sun on hot paint causes the coating to flash-cure before you can level it, leaving high spots and streaks.
Product Choice: Why HCC Is the Right Move
HCC Hybrid Ceramic Coating is the flagship all-surface Undrdog ceramic — cars, boats, bikes, planes, and yes, golf carts. Its hybrid formulation is DIY-friendly, self-levels well, and bonds to painted body panels, aluminum wheels, chrome, glass, and gel-coated surfaces. That last part matters — a cart has more different substrates than most cars, and having one coating that handles all of them means you're not buying five different bottles.
The Application Sequence
- Fold a fresh plush microfiber over a foam applicator block or suede applicator pad.
- Apply 4–6 drops of HCC in a line along the applicator face.
- Work in 2-foot by 2-foot sections, applying in a cross-hatch pattern (left-to-right passes, then top-to-bottom overlap).
- Watch for the rainbow flash across the wet surface — that's your cue that the coating is bonding.
- Wait 30–90 seconds for it to start setting (longer in cool humid conditions), then level with a fresh plush microfiber in straight parallel wipes.
- Buff with a second fresh plush microfiber until the surface is streak-free.
- Move to the next section. Overlap section edges by an inch to avoid hard boundaries.
Full step-by-step in our streak-free ceramic application guide.
Small Detail Areas
Chrome trim, badges (if you must keep them), rearview mirrors, and roof edges: use a smaller suede applicator strip and work slowly. These crevice areas are where streaks and high spots hide.
Wheels and Windshields
Do the wheels off the cart if possible — much easier to reach spokes and inner barrels. For polycarbonate windshields, apply HCC exactly like you'd apply a UV sealer to headlight lenses. Cures into a UV barrier that keeps the windshield from yellowing over the years.
Cure Time and First-Week Care
HCC's first-24-hours behavior on a cart mirrors what it does on paint anywhere else. Keep the cart dry for 24 hours minimum. No rain, no dew, no sprinklers, no hose. Full functional cure takes about 7 days — during that window, no aggressive scrubbing and no chemical wash. See our HCC curing timeline for the hour-by-hour breakdown.
Coating Options Compared for Golf Carts
| Protection | Typical Lifespan | Cost | Best For |
|---|---|---|---|
| Traditional carnauba wax | 4–8 weeks | $15 | Occasional-use cart, cosmetic touch-up |
| Spray sealant | 3–6 months | $25–40 | Renters, quick summer prep, low-effort |
| DIY ceramic spray | 6–12 months | $40–70 | Mid-range protection, easy application |
| Full DIY ceramic coating (HCC) | 12–24 months | $80–200 | Enthusiast, coastal, or year-round outdoor cart |
| Professional ceramic (2-layer) | 2–5 years | $500–1,200 | High-dollar customs, resort fleets, showcase carts |
Coastal, Community, and Course Considerations
Saltwater and Salt Air
Beachfront communities and island courses expose carts to salt spray year-round. Salt pits chrome, oxidizes aluminum, and dries out vinyl seats fast. A ceramic coating on painted panels and chrome is the single best defense. Rinse the cart with fresh water after every beach or dockside outing, and top up with Quick Detail monthly to keep beading strong.
Sunscreen and Insect Repellent
Both are aggressive on paint and vinyl. Sunscreen with avobenzone reacts with metal and stains vinyl seats permanently if left. DEET-based repellents dissolve some paint finishes on contact. A ceramic coating creates a chemical-resistant barrier — you still want to wipe spills fast, but you have hours instead of minutes before damage.
Grass, Sand, and Sprinkler Water
Sprinkler water on carts leaves the same mineral spots you'd get on a car — worse, because carts sit closer to sprinkler heads. Hydrophobic coating means water sheets off before minerals dry in.
Storage and Off-Season
Even carts that get parked indoors for winter benefit from ceramic — it prevents mystery mineral spots from long-term humidity and dust. A pre-storage wash + coating application is the best time to do the job.
Maintenance After Coating
- Wash with pH-neutral soap. Skip harsh degreasers on coated panels.
- Rinse after every beach or coastal drive. Fresh water flush before salt dries out.
- Top up with Quick Detail after every 3–4 washes. Extends beading and freshens gloss.
- Skip automated car washes with harsh chemicals. Hand wash the cart every time.
- Address bird droppings within 24 hours. Uric acid still etches through weakened coating spots.
One Bottle. Cart Body, Wheels, Chrome, Glass. Done.
HCC is the DIY-friendly hybrid ceramic that bonds to every surface on your cart — painted panels, aluminum wheels, polycarbonate windshield, chrome trim. Keep your cart looking new for years, not months.
Shop HCC Hybrid Ceramic Coating →Frequently Asked Questions
Can you ceramic coat a golf cart?
Yes. Golf carts benefit dramatically from ceramic coating because they live outside with more UV exposure than most cars. HCC works on painted body panels, aluminum wheels, polycarbonate windshields, chrome trim, and gelcoat surfaces — most of the exterior in one product.
How long does ceramic coating last on a golf cart?
DIY hybrid ceramic coatings like HCC last 12–24 months on a cart depending on exposure and wash habits. Coastal carts trend toward the lower end. Garage-kept indoor-charged carts push toward the upper end. Professional multi-layer coatings can push into the 3–5 year range at 5–10× the cost.
Is ceramic coating worth it for a golf cart?
For most enthusiast, coastal, or custom carts, yes. UV fading is the #1 depreciation factor on used carts, and ceramic coating dramatically slows fading. For a rental fleet or an under-used cart worth $2,000, the math is closer — spray sealant may make more sense.
Can I use car ceramic coating on a golf cart?
Automotive ceramic coating works on painted cart body panels. HCC is formulated as an all-surface hybrid ceramic and bonds to painted panels, aluminum, chrome, glass, and gelcoat, which covers most cart surfaces in one product.
How do you prep a golf cart for ceramic coating?
Two-bucket wash with pH-neutral soap, iron decontamination on wheels and painted panels, clay bar the painted surfaces, correct any oxidation or swirl marks with polish, and finish with an isopropyl alcohol panel wipe on every surface you plan to coat.
Can you ceramic coat a cart windshield?
Yes, and you should. Golf cart windshields are polycarbonate — same material as headlight lenses. UV yellows them over time, and a ceramic coating adds a UV barrier that dramatically slows the fogging. Apply after polishing out any existing haze. See our headlight restoration guide for the polycarbonate polishing technique.
Will ceramic coating make my cart faster or louder?
No. Ceramic coating is purely cosmetic and protective — it doesn't touch electrical, drivetrain, or noise components.
How much does it cost to ceramic coat a golf cart?
DIY: $80–200 in coating plus $30–50 in prep supplies. Professional: $500–1,200 depending on cart size, condition, and coating layers. A DIY HCC application delivers 80% of pro results at 20% of the cost if you do the prep right.
Can I ceramic coat a lifted or custom cart?
Yes. Lifted carts, street-legal carts, and custom paint jobs are prime candidates because they're higher-value and more visible. The application process is the same as any painted surface — clean, decon, correct, IPA wipe, coat.
How do I clean my golf cart after ceramic coating?
Rinse with fresh water first to knock off loose dirt. Wash with pH-neutral car soap using the two-bucket method. Dry with a clean microfiber or blower. Top up with Quick Detail every few washes to keep hydrophobic properties strong. Avoid degreasers and abrasive pads on coated surfaces.

Leave a comment
This site is protected by hCaptcha and the hCaptcha Privacy Policy and Terms of Service apply.