


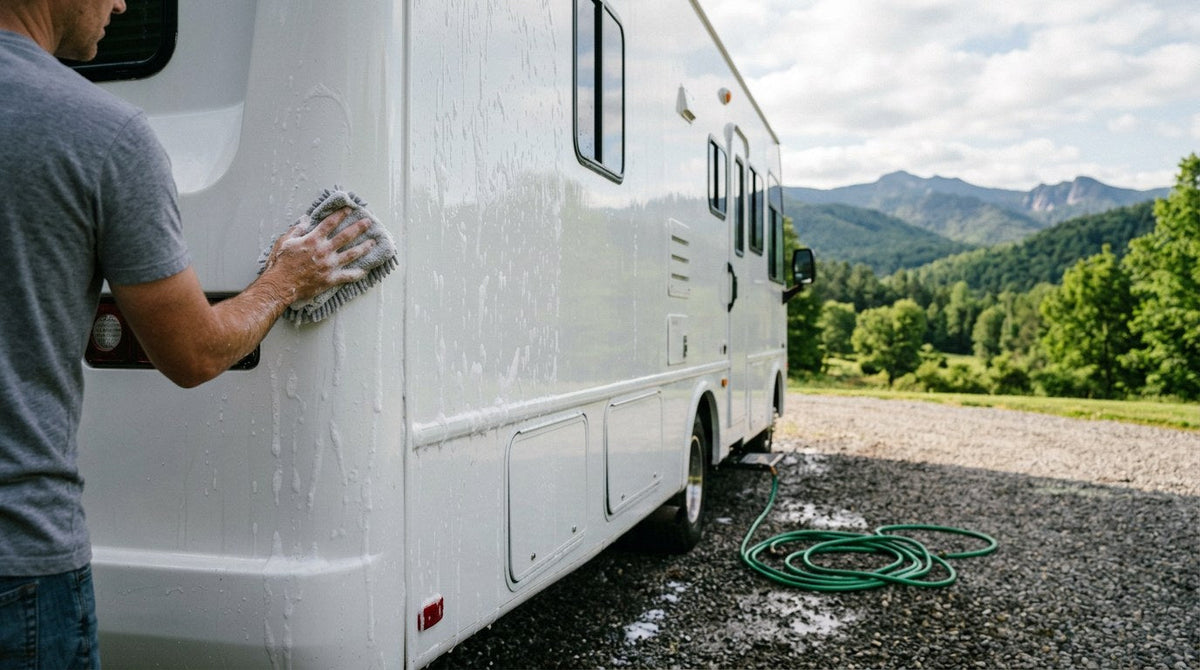
To get a water-spot-free wash on a motorhome, you need to control three things at the same time: the mineral content of the water you're rinsing with, the temperature and sun exposure of the panels while you wash, and how quickly you dry each section before it can air-dry. Water spots are dissolved calcium and magnesium salts (and other total dissolved solids) that stay behind after the water evaporates — the fix is either to remove the minerals before rinse, or to remove the water before it evaporates. Every "spot-free wash" trick fits inside those two options.

Why Motorhomes Water-Spot More Than Cars
A motorhome is a much bigger, taller, more porous target than a car — and that changes everything about how water dries on it.
- Surface area. A Class A can have 300–400+ square feet of exterior surface. By the time you're rinsing panel 20, panel 1 has been drying in the sun for 30 minutes.
- Height. Roofs, top slide-out corners, and cap panels stay wet longer, drip onto lower panels, and re-deposit minerals as they run.
- Gel coat porosity. Older or unprotected gel coat is microscopically porous. Minerals don't just sit on top — they can wick into the surface. That's why "won't come off with soap" spots are more common on RVs than on cars.
- Water source variability. Home hose, campground spigot, dump-station rinse, in-park pressure washer — every stop has different water hardness. According to the USGS Hardness of Water reference, water hardness is a measure of dissolved calcium and magnesium, and it varies dramatically by region.
- Wax and coating gaps. Many RVs are protected on the sides but neglected on the roof, cap, and rear — and mineral-loaded runoff from the roof is the single biggest source of visible spotting on the front cap.
What "Water Spots" Actually Are (In One Paragraph)
When water evaporates off a panel, the water molecules leave — but the dissolved solids in that water do not. Calcium carbonate, magnesium salts, silicates, iron, and other minerals crystallize on the surface in the exact shape of the drop or run they were carried in. The USGS classifies water as soft (0–60 mg/L calcium carbonate), moderately hard (61–120), hard (121–180), or very hard (over 180 mg/L). The EPA's Secondary Drinking Water Standards flag Total Dissolved Solids over 500 mg/L as a nuisance-level threshold. Your water can be well below EPA drinking standards and still be more than hard enough to leave visible spots on a white RV cap.

The Complete Spot-Free Motorhome Wash Sequence
This is the routine. Every step below exists specifically to prevent minerals from being deposited on the surface or to remove water before it can evaporate.
Step 1: Time the wash
- Wash early morning or late evening — panel temperature below body temperature is the goal.
- Never wash in direct midday sun. A sun-heated panel flash-dries every drop between rinse and dry.
- Overcast is ideal. A light drizzle is fine to wash in and often better than dry heat.
- If you can't avoid sun, work on the shaded side of the coach first and rotate the coach or work by sections small enough to fully dry before moving on.
Step 2: Pre-rinse from top to bottom
- Rinse the roof first with a soft flow to lift dust, pollen, tree debris, and mineral runoff before they run down the sides mid-wash.
- Use as little pressure as needed. Pressure washing loose seals and roof material is a bigger risk than any bit of grime you're chasing.
Step 3: Foam or pre-soak
- A pH-neutral foam pre-soak on hot dry panels does two things: it holds moisture on the panel long enough to soften soil, and it emulsifies road film so your wash mitt isn't grinding it into the finish.
- If you're using a coating-safe wash, this is where it goes. Skip anything advertised as "wax-stripping" or "acid pre-treatment" unless you're specifically doing a decontamination — those will strip protection you already have.
Step 4: Two-bucket contact wash, one panel at a time
- Bucket #1 (wash): fresh water + car/RV wash soap.
- Bucket #2 (rinse): plain water, grit guard on the bottom.
- Rinse the mitt in bucket #2 after every panel, wring, reload from bucket #1.
- Wash top-down: roof → cap → upper sides → slide-outs → lower sides → wheels last (or use a separate mitt for wheels).
- Work in panels small enough that you can rinse and dry the panel before the soap has any chance to air-dry. On a 40-foot Class A, that's typically a 4–6 foot section, not a whole side.
- The technique for this is the same one that keeps a car swirl-free — see the two-bucket and rinseless wash method breakdown for the full protocol.
Step 5: Rinse each panel immediately
- Rinse from the top of that panel down. Sheet the water off — take the nozzle off and let a low-pressure open-hose flow break the surface tension so water leaves in sheets, not droplets.
- The fewer standing droplets you leave, the less mineral you'll deposit if the panel starts to dry.
Step 6: Dry that panel — do not move on until it's dry
- Blot with a large, plush microfiber drying towel. Do not drag or scrub.
- Two towels beats one big one — swap when the first is saturated.
- If you have a leaf blower or a purpose-built car dryer, use it on the cracks, mirror housings, seams, and slide-out top edges where water hides and drips minutes later, ruining the panel you already dried.
Step 7: Repeat by panel
- Foam → wash → rinse → dry, one panel at a time, until the coach is done.
- This sounds slow. It is. It's also the difference between a spot-free finish and spending an hour with a water-spot remover afterward.

Water Filtration Options: DI, RO, or Softener
If you regularly wash where the water is hard, filtering the wash water is the single biggest upgrade you can make. Here's the honest comparison.
| Filtration Type | How It Works | Output Quality | Cost / Ongoing | Best For |
|---|---|---|---|---|
| Deionization (DI) | Ion-exchange resin swaps mineral ions for hydrogen/hydroxide, producing near-zero-TDS water | Typically 0–5 TDS at output; effectively spot-free | Moderate upfront; resin needs replacement based on volume and incoming water hardness | Full-time RVers, mobile detailers, anyone in very hard water areas |
| Reverse Osmosis (RO) | Water forced through a semi-permeable membrane; rejects most dissolved solids | Very low TDS output; slower flow rate; produces wastewater | Higher upfront; membrane replacement periodically | Home-base setups where flow rate is less critical than filter life |
| Water Softener (ion-exchange, salt-regenerated) | Swaps calcium/magnesium for sodium; reduces hardness but not TDS | Softer water, still leaves visible spots on paint (the sodium salts still crystallize) | Low ongoing; requires salt refills | Household plumbing and appliances, not vehicle-wash spot prevention |
| Sediment / carbon filter only | Removes particulates and some organics; does not remove dissolved minerals | Cleaner water, similar TDS to input | Low | Improving general water quality, not eliminating spots |
The takeaway: Only DI and RO produce water low enough in dissolved solids to actually air-dry spot-free. A softener does not — many RVers assume softened water won't spot, and it will. If you're picking one, DI is usually the more RV-practical choice: portable, no wastewater, and the flow rate is fine for hand-washing.
What to Do When Your Water Is Not Filtered
You won't always have DI water. Most of the time you're at a campground with an unknown spigot, or at home with hard-well water. That's when technique carries the whole load.
- Work smaller sections. The harder the water, the smaller the section you should let sit wet before drying.
- Never let a panel air-dry. Ever. If you notice a panel drying while you're washing the next one, stop and wipe that panel down first, then go back.
- Sheet the rinse. Nozzle off, low pressure, water leaves in sheets. Fewer droplets = fewer spot nuclei.
- Add a rinse aid or coating. A hydrophobic coating on the panel makes water bead and roll instead of sitting flat. That doesn't stop spots on its own, but it buys you time to blot before evaporation starts. For a maintained ceramic-coated coach, a mid-wash pass with Quick Detail boosts sheeting and slick after every panel.
- Wash by shade. Follow the shadow. If the roof-line shade is on the north side at 9 AM and the west side at 4 PM, plan the route.
- Blot corners and seams last. Trapped water in slide seals and mirror housings will drip five minutes later — hit them with a leaf blower or absorbent towel before you consider the wash "done".
Removing Water Spots That Are Already There
Prevention is the priority, but if spots are already baked on (especially on a white fiberglass cap that sat outside all summer), you have a specific removal workflow:
Fresh spots (still visible but not etched)
- Wash, then wipe the affected panel with a dedicated water-spot remover formulated for automotive/RV surfaces. Undrdog's Water Spot Remover is designed for exactly this — dissolve the mineral crystal without stripping paint or coating.
- Work small panels, keep wet, wipe with a clean microfiber, then rinse thoroughly with the softest water you can get.
Older spots (mild etching visible in raking light)
- A water-spot remover will handle most of it.
- Any residual haze in the clear coat or gel coat may need a light polish — see the full workflow in how to remove water spots from car paint without damaging it.
Deep etching in gel coat
- Compound → polish → protect. This is closer to gel-coat restoration than a wash. If the coach is a good candidate for full protection afterward, the ceramic step should come after the correction — never over baked-in spots you plan to remove later.
Coatings and Toppers That Make Spots Easier to Deal With
A ceramic-coated surface doesn't stop water spots. Nothing at this price point does, and any product claiming otherwise is overselling. What a good coating does do:
- Makes water bead and sheet off, reducing standing droplets that can dry.
- Makes any deposited minerals sit on top of the coating rather than in the paint or gel coat — so they wipe off with a rinse or water-spot remover much more easily.
- Buys you time between when the panel is rinsed and when you have to dry it.
HCC (Hybrid Ceramic Coating) is Undrdog's flagship all-surface hybrid ceramic — designed to work on RV fiberglass, gel coat, painted panels, glass, metal, and plastic trim on the same coach. It's a multi-year coating that leans on prep and maintenance rather than a stamped bottle number: coating life is a function of how the surface was prepped, what environment it lives in, and how it's washed, in the same way engine life depends on how a vehicle is driven and maintained, not on a single number on the box.
For between-wash maintenance and spot-prevention boost between full washes, Quick Detail is the workhorse — spray on a wet panel after rinse and before drying to increase slickness and sheeting.
Motorhome-Specific Spot Trouble Zones
Front cap
The front cap collects mineral runoff from the entire roof line, has more surface area than any other single panel, and sits in the sun the longest during a wash. Do it first, in the shade if possible, and don't let it sit rinsed for more than 30–45 seconds before drying.
Slide-out roofs
Water pools at the outer edge of slide-out roofs and drips onto the side wall for 15–30 minutes after you think the wash is finished. Blow the seam out with a leaf blower or towel-blot along the seal before final dry.
Awning tubes
Water hides inside the awning tube and drips down when the coach is next moved or when the awning is deployed. Roll and unroll the awning a couple of times during the drying step and blot both ends.
Roof around vents and A/C shrouds
Water beads and pools around the base of every rooftop appliance. Skip drying these and they become the mineral factory for the next runoff cycle.
Waterless and Rinseless Alternatives
Not every wash has to be a full water wash. When water is scarce, water quality is poor, or you're maintaining a mostly-clean coach between deep washes, a rinseless or waterless method removes minerals with encapsulating chemistry and controlled towel work rather than a hose. The tradeoff is that rinseless works best on lightly soiled surfaces — heavy road film or bug matter needs a full traditional wash first. For the full comparison and technique, see rinseless wash vs waterless wash.
Motorhome Wash Frequency
- Active travel season: Rinse after long drives and any exposure to salt, sand, or bug-heavy interstate miles. Full wash every 2–4 weeks depending on use.
- Storage/off-season: Full wash before storage; full wash immediately when uncovered. Long-sit spots are the hardest to remove.
- After campground exposure to sprinklers or hard-water lines: Rinse the same day if possible. Sprinkler overspray dries fastest and etches hardest.
FAQ
What causes water spots on a motorhome specifically?
Dissolved calcium, magnesium, silicates, and other minerals in the wash and rinse water. When the water evaporates, the minerals crystallize on the panel in the drop's shape. The bigger the coach and the hotter the panels, the more chances water has to air-dry before you get there to wipe it.
Do I need DI water to wash spot-free?
Not always. In soft-water areas with careful technique — small sections, immediate drying, no direct sun — you can wash a coach spot-free with tap water. In hard-water areas, DI or RO water dramatically reduces the risk and removes technique errors from the equation.
Is a water softener enough?
No. A softener swaps hard mineral ions for sodium ions. The sodium still crystallizes as water evaporates and still leaves visible deposits, especially on darker paint. A softener is for household plumbing and appliances; use DI or RO for spot-free vehicle water.
How long can I leave water on a motorhome before it spots?
Depends on temperature and water hardness. On a hot panel in the sun with hard water, standing droplets can start to visibly spot in 60 seconds. On a shaded, cool panel with softer water, you may have 5–10 minutes. Never rely on this — dry every panel immediately.
Will a ceramic coating stop water spots?
No coating stops water spots outright — dissolved minerals still deposit when water evaporates. A good hybrid ceramic like HCC makes water bead and sheet off (fewer droplets left standing), makes any deposited minerals sit on top of the coating rather than in the paint, and makes water-spot remover work much faster on the ones that do land. It buys time and reduces damage, not spot immunity.
Can I wash my motorhome at a coin-op / high-pressure wash?
Only if the coach is designed for it and the seals/awning are intact. Even then, coin-op water is typically municipal tap and will spot the same as home hose water. The touchless option protects the finish from scratches but does nothing about mineral content. If you use one, follow up with a hand dry.
What's the fastest way to prevent spots on a full coach wash if I don't have DI water?
Work early morning in the shade, wash and dry one small panel at a time, sheet the rinse instead of spraying, and blot with two large plush microfibers per panel. Add a hydrophobic spray after rinse to speed sheeting on the next panel while you dry the current one.
Should I dry a motorhome with a leaf blower?
Yes for seams, mirror housings, roof appliance bases, slide-out edges, and awning tubes — anywhere water hides and drips minutes later. Not as the primary drying method on flat panels; microfiber blotting is faster and lower-risk of blowing grit against the surface.
What temperature is too hot to wash a motorhome?
If you can hold your hand on the panel comfortably, you're fine. If it's uncomfortable within 3 seconds, wait for shade or evening. Panel surface temperature matters more than air temperature — a white RV in 85°F full sun can easily hit 130°F+ on top surfaces.
How often should I use a water-spot remover?
As a corrective, not routine — only when spots are visibly present. Overusing water-spot remover on painted or coated panels isn't necessary and can strip protection over time if the product is aggressive.
How Undrdog Approaches This
The Undrdog philosophy on water spots is the same as on the rest of the industry: don't sell you protection you don't need, and don't oversell what protection you do have. A well-prepped HCC application on an RV cap and side walls gives you years of easier washes, faster water sheeting, and simpler spot cleanup — how many years depends on prep, exposure, storage, and how you wash it, not a number on the bottle. Between full washes, Quick Detail keeps beading behavior fresh. And when spots do land, Water Spot Remover dissolves the mineral without stripping the coating you already spent time building.
Ready to stop chasing water spots?
Start with the technique above. If you want the finish to hold up to campground water and long summer travel, coat the exterior with HCC — Hybrid Ceramic Coating. One product covers fiberglass, gel coat, paint, glass, and metal on the same coach — one wash-and-coat, multi-year protection dependent on prep and care, not marketing math.

Leave a comment
This site is protected by hCaptcha and the hCaptcha Privacy Policy and Terms of Service apply.